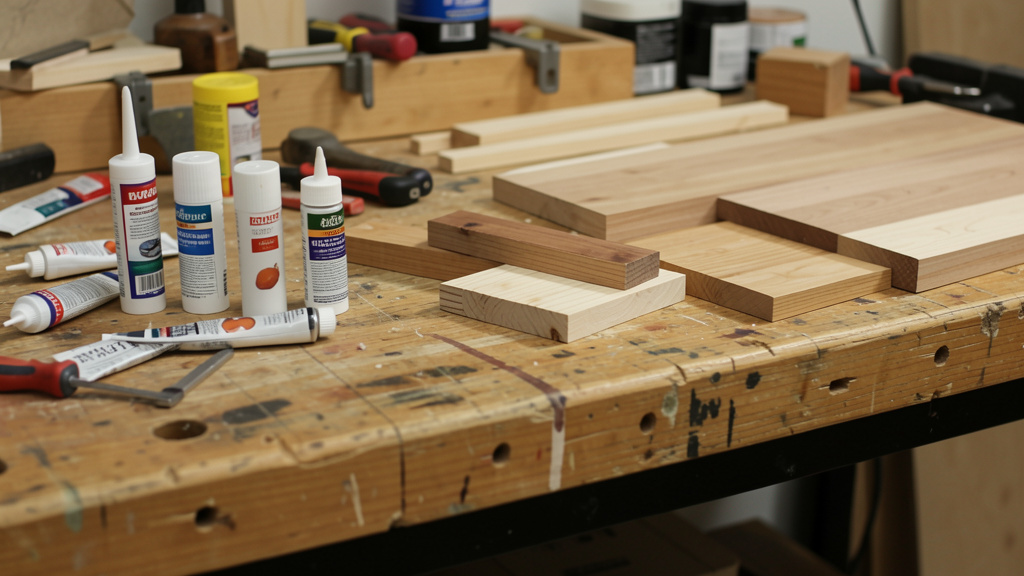
Move beyond guesswork with a clear, step-by-step framework for selecting adhesives that deliver consistent, long-lasting results across wood, metal, plastic, ceramic, and challenging material combinations.
Few workshop frustrations are as disheartening as watching a carefully assembled project fail at the joint. The chair leg that wobbles after a week. The repaired ceramic vase that separates with gentle handling. The outdoor fixture that detaches after seasonal weather shifts. These outcomes rarely stem from poor craftsmanship alone—they often reflect a common gap: treating adhesive selection as an afterthought rather than an intentional engineering decision. This guide replaces uncertainty with clarity. Through a structured, material-aware framework grounded in polymer science principles and documented application patterns, you’ll develop the confidence to choose adhesives aligned with your specific materials, environmental conditions, and stress demands. Whether restoring heirloom pieces, assembling outdoor structures, or tackling complex repairs, this approach supports bonds designed to endure.
Introduction
Hardware store aisles present a wall of adhesive options: tubes labeled epoxy, cyanoacrylate, polyurethane, PVA, silicone. Marketing claims emphasize “industrial strength” or “bonds anything,” while fine print reveals critical limitations. This complexity often leads makers—seasoned and new alike—to default to familiar choices (like yellow wood glue for all wood projects) or price-driven selections. The result? Compromised integrity, wasted materials, and diminished trust in the process.
Adhesive performance follows predictable patterns rooted in material science. Bond failure typically occurs when an adhesive’s chemical properties cannot accommodate the substrates’ surface characteristics, environmental exposure, or mechanical stresses. This guide isn’t about memorizing brand names. It’s about understanding why certain adhesives succeed where others falter. Synthesizing insights from material compatibility references and documented application patterns, this resource translates technical principles into an accessible decision system. You’ll shift from trial-and-error to intentional, informed bonding—project after project.
Consider a scenario where a ceramic artist restores a vintage Art Deco lamp. Standard cyanoacrylate repairs failed repeatedly. Research revealed the glazed ceramic surface had low surface energy due to decades of handling residue. Switching to a two-part epoxy formulated for challenging substrates—paired with meticulous cleaning using isopropyl alcohol—created a bond exceeding the original ceramic’s strength. This outcome wasn’t luck; it was chemistry matched deliberately to material reality. This guide equips you to apply that same precision consistently.
The Bond Integrity Framework: A Five-Step Decision System
Forget vague advice like “use strong glue.” Durable adhesion requires evaluating five interconnected factors. Skipping any step increases failure risk. This framework—refined through analysis of documented adhesive applications—transforms selection into a repeatable, logical process. Each step builds on the previous, creating clarity without overwhelming complexity. Master this sequence, and you’ll intuitively recognize why a specific adhesive suits a given scenario.
Step 1: Decode Your Substrates—The Non-Negotiable Foundation
Before considering adhesives, deeply understand the materials being joined. Adhesion occurs at a microscopic level where adhesive molecules interact with substrate surfaces. Every material has a “surface energy”—a measure of how readily it accepts bonding. High surface energy materials (clean wood, bare metal) readily bond. Low surface energy materials (polypropylene plastic, Teflon, oily woods) resist adhesion. Misjudging this is a frequent cause of failure.
Why this step matters: An adhesive designed for polar surfaces (like wood cellulose) cannot form a reliable bond on non-polar surfaces (like polyethylene). No amount of clamping compensates for this fundamental mismatch. Surface energy isn’t visible. That “smooth plastic” could be ABS (generally bondable) or polypropylene (requiring specialized approaches).
How to assess substrates effectively:
1. Identify precisely: Avoid “plastic.” Check recycling symbols (♻️ #1–#7). Note metal types (ferrous vs. non-ferrous). For wood, identify species (oily like teak vs. porous like pine) and finish state (raw, sealed, painted).
2. Evaluate surface condition: Is it clean? Grease, dust, wax, or old adhesive residue creates barriers. Is it porous (wood, concrete, unglazed ceramic) or non-porous (glass, metal, glazed tile)? Porous materials absorb adhesive; non-porous require adhesives that cure chemically. Is it rigid or flexible? Bonding rubber to metal demands flexibility; bonding steel plates favors rigidity.
3. Simple surface energy test: Place a drop of water on the clean, dry surface. If it beads tightly (like on waxed car paint), surface energy is low—bonding will be challenging. If it spreads flat, surface energy is high—most adhesives will perform well. This “water break test” is widely used in industrial preparation.
Common pitfalls to avoid:
Assuming all plastics behave alike: Polypropylene (#5) requires specialty adhesives or surface treatment. Standard cyanoacrylate will fail.
Ignoring surface finishes: Gluing over varnish, paint, or laminate without abrasion. The adhesive bonds to the coating, not the substrate. When the coating fails, the bond fails.
Overlooking moisture content: Bonding green (freshly cut) wood with rigid PVA glue. As wood dries and shrinks, internal stress cracks the glue line. Flexible polyurethane is often better suited.
Neglecting dissimilar materials: Metal expands/contracts more than wood with temperature shifts. A rigid epoxy may crack; a slightly flexible adhesive often accommodates movement better.
Applied example: Attaching a stainless steel hook to a ceramic tile backsplash.
Substrate 1: Stainless steel (high surface energy when clean, non-porous, rigid).
Substrate 2: Glazed ceramic tile (high surface energy when clean, non-porous, rigid).
Critical factor: Impeccable cleaning is essential—any cooking grease creates a failure point.
Conclusion: High surface energy materials support strong bonds. Non-porous nature requires an adhesive that cures chemically with good initial tack. Epoxy or high-strength acrylic adhesives are strong contenders. Silicone may hold but typically lacks the shear strength needed for weight-bearing hooks.
Step 2: Map the Environmental Context—Where the Bond Will Live
A bond thriving indoors may degrade rapidly outdoors, in humid bathrooms, or under temperature extremes. Environment involves interconnected factors that influence adhesive longevity. Ignoring this context explains why many initially successful bonds fail weeks or months later.
Why this step matters: Adhesives are polymer-based. Heat, UV radiation, moisture, and chemicals can degrade polymer chains over time, causing softening, embrittlement, or loss of adhesion. An adhesive suitable for a stable indoor environment may lack resilience for dynamic conditions.
Systematically evaluate these factors:
Temperature range: Document realistic lows and highs the bond will encounter, including seasonal shifts and proximity to heat sources (ovens, direct sun on surfaces). Note: Curing temperature and service temperature are distinct.
Moisture exposure: Constant immersion (aquarium, boat)? Occasional splashes (kitchen)? High humidity (bathroom, basement)? Condensation cycles? Moisture is a primary cause of bond degradation.
UV/sunlight exposure: Direct sun accelerates degradation in many polymers (standard epoxies, some polyurethanes), causing discoloration and strength loss. “UV-resistant” varies—verify product specifications.
Chemical exposure: Contact with oils, solvents, cleaners, acids (vinegar), or alkalis? Even mild household chemicals can weaken bonds over repeated exposure.
Load type:* Static (unchanging stress, like a picture frame corner) vs. dynamic (vibration, impact, cyclic stress like a tool handle). Dynamic loads demand greater flexibility and fatigue resistance.
Common pitfalls to avoid:
Using interior adhesives outdoors: Standard PVA wood glue swells and loses strength with moisture exposure. Outdoor projects require adhesives explicitly rated for exterior use (polyurethane, marine epoxy, specific construction adhesives).
Ignoring thermal movement: Bonding metal to exterior wood with rigid epoxy. Differential expansion/contraction creates stress. A flexible polyurethane adhesive often accommodates movement better.
Underestimating humidity: Mounting heavy items in steam-prone bathrooms with adhesives not rated for high humidity. Moisture penetrates micro-gaps over time. Silicone or polyurethane adhesives with humidity resistance are preferable.
Confusing “water-resistant” with “immersion-proof”: Many “waterproof” adhesives resist splashes but fail under constant submersion. True immersion demands marine-grade epoxy or specifically formulated polyurethanes.
Applied example: Repairing a snapped plastic kayak paddle.
Environment: Freshwater/saltwater immersion, UV exposure, temperature swings (-10°F to 110°F), dynamic stress from paddling.
Analysis: Requires flexibility to handle paddle flex, UV resistance, true waterproofness, and adhesion to likely polypropylene/polyethylene (low surface energy).
Conclusion:* Standard epoxy is too rigid and may not bond well. A flexible marine-grade polyurethane adhesive formulated for polyolefins (e.g., G/flex 650), paired with thorough surface abrasion and cleaning, offers a more suitable solution.
Step 3: Clarify the Forces Acting on the Bond
“Strength” is not a single property. An adhesive with high tensile strength (resisting pull-apart force) may fail under peel stress (lifting from an edge). Identifying the dominant stress type guides adhesive selection far more effectively than seeking the “strongest” option.
Why this step matters: Adhesive datasheets list multiple strength values (lap shear, tensile, peel). Choosing based solely on peak PSI is misleading. Peel stress demands flexibility to resist crack propagation; shear stress requires high cohesive strength. Mismatching adhesive properties to stress type causes premature failure.
Identify primary stress types:
Tensile: Force pulling bonded pieces directly apart (e.g., hanging a shelf bracket vertically). Requires high cohesive strength.
Shear: Force causing surfaces to slide parallel (e.g., books on a shelf, wall-mounted bracket). Most structural bonds face shear; requires high lap shear strength.
Peel: Force lifting one substrate from an edge (e.g., tape removal, veneer lifting). Highly demanding; requires flexibility and strong edge adhesion. Rigid adhesives fail quickly under peel.
Cleavage: Localized prying force at a bond edge (e.g., crowbar under flooring). Similar to peel; benefits from flexibility.
Impact: Sudden force (e.g., dropping a repaired item). Requires toughness and energy absorption—often flexible adhesives.
Fatigue: Repeated cyclic loading (e.g., bicycle pedal, door hinge). Demands exceptional durability against crack growth.
Common pitfalls to avoid:
Using rigid epoxy for peel-prone bonds: Bonding flexible rubber to metal with rigid epoxy. Flexing creates peel stress at edges, cracking the brittle bond. Flexible silicone or polyurethane is preferable.
Ignoring cleavage in thin materials: Gluing veneer to plywood with standard PVA. Substrate flexing causes edge lifting. Contact cement (instant bond) or flexible adhesive reduces risk.
Overlooking impact needs: Repairing a child’s toy with brittle super glue. Impact shatters the bond line. Rubber-toughened cyanoacrylate or flexible plastic epoxy is more appropriate.
Excessive clamp pressure: Squeezing out all adhesive creates a “starved joint” with minimal bonding area. Optimal pressure leaves a thin, consistent glue line.
Applied example: Mounting a stone soap dish to a vertical ceramic tile shower wall.
Forces: Primarily shear (weight pulling down), minor peel stress at the top edge if bumped, constant moisture exposure.
Analysis: Needs high shear strength to hold weight vertically. Some flexibility helps resist peel at the top edge. Must be waterproof and mold-resistant.
Conclusion:* Rigid epoxy may hold shear but fail at the edge under peel. Standard silicone has flexibility and waterproofness but lower shear strength—risk of slow slippage. A high-strength, flexible polyurethane construction adhesive (e.g., Sikaflex-221) or specialty tile adhesive often provides the best balance. Impeccable surface cleaning is essential.
Step 4: Match the Adhesive Chemistry—Translating Analysis into Selection
Synthesize Steps 1–3 to select the appropriate adhesive chemistry family. Each category has inherent strengths, limitations, and ideal applications defined by molecular structure. This step eliminates unsuitable options and focuses your choice.
Why this step matters: No single adhesive excels universally. Understanding core properties of each chemistry family prevents fundamental mismatches. This transforms selection from label-reading to informed specification.
Adhesive Chemistry Decision Guide:
-
Polyvinyl Acetate (PVA) – “White & Yellow Wood Glue”
- Best for: Porous materials (wood, paper, cardboard), interior projects, tight-fitting joints. Yellow glue (aliphatic resin) offers slightly better water resistance than white.
- How it works: Water-based; penetrates pores, cures as water evaporates, forming a mechanical bond within fibers.
- Key limitations: Standard grades are not waterproof—swell and lose strength with moisture. Poor on non-porous surfaces. Requires clamping. Brittle—low impact/peel resistance. Fails if cured below freezing.
- When to choose: Interior woodworking (furniture, cabinets) with clean, dry, porous wood. For occasional moisture exposure (e.g., cutting boards), use waterproof (Type II) PVA—but remember, wood finishing provides primary moisture protection.
- Practical tip: For weak end-grain wood joints, apply a “sizing” coat: thin PVA 50/50 with water, let dry, then apply full-strength glue. This seals pores for better bonding.
-
Cyanoacrylate (CA) – “Super Glue”
- Best for: Instant bonding of small, tight-fitting parts; non-porous materials (metal, hard plastic, ceramic); quick repairs.
- How it works: Reacts with surface moisture to polymerize rapidly. Forms rigid bonds on compatible surfaces.
- Key limitations: Brittle—poor impact, peel, and shear strength on larger areas. Bonds skin instantly. Fumes may fog optics. Poor gap-filling. Many plastics (PP, PE) require specialty formulas. White “blooming” can occur.
- When to choose: Fixing ceramic chips, bonding metal findings, securing model parts, temporary tack-holding. Avoid for structural bonds, flexible materials, or large surfaces.
- Practical tip: Use medium/thick viscosity CA for porous materials. For difficult plastics, apply a CA primer first to micro-etch the surface.
-
Epoxy (Two-Part)
- Best for: High-strength bonds; dissimilar materials (metal to wood, ceramic to concrete); gap-filling; chemical/heat resistance; marine applications.
- How it works: Resin and hardener chemically react to form a dense, cross-linked polymer network. Cures rigid with exceptional cohesive strength.
- Key limitations: Requires precise mixing ratio. Limited pot life (working time). Generally rigid (flexible formulations exist). Surface prep is critical. Standard grades may yellow with UV exposure.
- When to choose: Boat repair, automotive fixes, bonding metal brackets, filling cracks in wood/stone, high-stress tool repairs. Use marine epoxy for constant immersion.
- Practical tip: Lightly abrade smooth metals/plastics before cleaning. Mix on disposable surfaces (wax paper, paper cup), scraping container sides thoroughly. For vertical applications, use non-sag thickened epoxy.
-
Polyurethane
- Best for: Waterproof bonds; dissimilar materials with different expansion rates; flexible yet strong bonds; outdoor projects; foam, wood, metal, ceramic.
- How it works: Reacts with ambient moisture to cure. Forms a tough, slightly flexible bond with good impact resistance. Expands slightly during cure.
- Key limitations: Requires some moisture to cure—very dry environments slow curing. Excess moisture causes foaming. Strong odor during application. Not ideal where maximum rigidity is required.
- When to choose: Outdoor furniture, deck repairs, garden pots, bonding foam insulation, projects needing flexibility (e.g., wood to metal subject to temperature shifts).
- Practical tip: Lightly dampen one surface per product instructions. Clamp firmly to control expansion. Wipe excess immediately with mineral spirits. Use painter’s tape to protect adjacent surfaces.
-
Silicone
- Best for: Sealing and flexible bonding; high heat resistance; accommodating movement; glass, metal, ceramic.
- How it works: Cures to a rubbery, elastic seal that handles expansion, contraction, and vibration.
- Key limitations: Low tensile/shear strength—not for rigid structural bonding. Most paints won’t adhere. Acetoxy types (vinegar smell) can corrode metals; use neutral-cure for sensitive metals.
- When to choose: Window sealing, aquarium assembly (only 100% silicone labeled “aquarium-safe”), gasketing, flexible trim, high-heat applications (oven gaskets—use high-temp RTV).
- Practical tip: For aquariums or food-contact surfaces, verify explicit “aquarium-safe” or “food-grade” labeling. Standard bathroom/kitchen silicone contains additives harmful to aquatic life. Smooth beads with a wet finger for clean finishes.
-
Construction Adhesives (Hybrid Polymers – MS Polymers, SMP)
- Best for: Heavy-duty building applications; subflooring, sheathing, trim, paneling; diverse substrates (wood, metal, concrete, foam); excellent initial grab.
- How it works: Modern hybrids combine strengths: high strength like polyurethane, flexibility like silicone, low odor, paintability, strong adhesion with minimal prep.
- Key limitations: Requires caulking gun. Full cure time can be slow (though initial grab is good). Less ideal for tiny, precise repairs.
- When to choose: Installing crown molding, bonding subfloor, attaching furring strips, mounting heavy panels, outdoor construction. Often a versatile professional choice.
- Practical tip: For vertical applications (molding), use adhesive with nails/screws for immediate support during cure. Choose “low-VOC” formulas for indoor air quality. Clean nozzle immediately after use.
-
Hot Melt Adhesives (Hot Glue)
- Best for: Temporary bonds, crafts, non-structural assembly, heat-sensitive materials.
- How it works: Thermoplastic—solid when cool, liquid when heated. Sets rapidly on cooling.
- Key limitations: Low heat resistance (softens around 150°F/65°C). Lower bond strength than reactive adhesives. Poor long-term durability (can become brittle). Not waterproof.
- When to choose: School projects, temporary jigs, attaching fabric to foam core, sealing boxes, bonding materials incompatible with liquid adhesives. Avoid for permanence, strength, heat, or outdoor use.
- Practical tip: Use temperature-controlled guns. Low-temp glue suits delicate materials (styrofoam) but has weaker bonds. Roughen smooth surfaces slightly for better mechanical keying.
The Guiding Principle: Adhesive selection succeeds not by finding the “strongest” adhesive in isolation, but by identifying the adhesive whose specific properties align with your exact substrates, anticipated environment, and dominant stress forces. A well-matched “moderate-strength” adhesive will consistently outperform a mismatched “high-strength” option.
Step 5: Execute the Application Protocol—From Theory to Durable Bond
Perfect adhesive choice fails with poor execution. Application technique is where preparation meets practice. This step covers essential practices that transform a sound selection into a reliable bond.
Why this step matters: Many bond failures trace to surface preparation or application errors—not adhesive deficiency. An adhesive bonds only to what it contacts. Contaminants create invisible barriers. Incorrect clamp pressure creates weak joints. Rushing cure time invites failure.
Universal Bonding Protocol:
1. Surface Preparation (The Critical Phase):
* Clean thoroughly: Remove dirt, grease, oil, wax, dust. Use isopropyl alcohol (70%+) on lint-free cloth for metals, glass, plastics. For wood, ensure dryness and remove sawdust (tack cloth ideal). For oily woods (teak, rosewood), test acetone on a hidden area first, then sand.
* Abrade smooth surfaces: Lightly sand non-porous materials (metal, plastic, glass) with 120–180 grit sandpaper to create “tooth” for mechanical adhesion. Wipe away all dust.
* Ensure dryness: Surfaces must be dry unless using a moisture-cure adhesive (like polyurethane) where controlled moisture is specified.
* Prime if needed: For challenging plastics (PP, PE) or critical bonds, use a manufacturer-recommended primer.
-
Adhesive Application:
- Follow instructions precisely: Mixing ratios (epoxy!), open time, temperature limits. This is essential.
- Apply appropriately: For porous materials, glue both surfaces for penetration. For non-porous, a thin, even layer on one surface often suffices. Avoid excess—starved joints are weak, but flooded joints create weak boundary layers.
- Work efficiently: Have parts aligned and clamps ready before applying adhesive. Respect open time.
-
Clamping & Fixturing:
- Apply even pressure: Distribute clamps to avoid weak spots.
- Optimal pressure: Aim for a thin, consistent squeeze-out bead. No squeeze-out = starved joint. Excessive squeeze-out = weak glue line and mess. For wood, a hairline bead is ideal.
- Prevent slippage: For vertical bonds or low-tack adhesives, use tape, pins, or temporary fasteners to hold alignment before clamping.
- Protect surfaces: Place scrap wood (cauls) between clamps and project. Use wax paper under clamps to prevent bonding to fixtures.
-
Curing Environment & Time:
- Control conditions: Most adhesives cure best between 65°F–80°F (18°C–27°C) with moderate humidity. Cold slows cure; heat may cause bubbling.
- Respect full cure time: “Handling strength” (clamp removal time) is not full strength. Full chemical cure often takes 24–72 hours (longer for thick epoxy sections). Avoid stressing the bond during this period.
- Ventilate: Work in well-ventilated areas, especially with solvent-based or strong-odor adhesives. Wear nitrile gloves.
Common pitfalls to avoid:
Skipping final cleaning: “Looks clean” isn’t sufficient. Invisible oils from fingers prevent adhesion on metal/glass.
Over-clamping wood: Squeezing out all glue creates a starved joint with minimal strength. Maintain that thin glue line.
Rushing clamp removal: Removing clamps at “tack-free” time risks bond failure. Wait the recommended clamp duration.
Ignoring temperature: Applying epoxy below its minimum cure temperature (often 50°F/10°C) may prevent full cure. Warm components slightly if needed (per product guidelines).
Incomplete epoxy mixing:* Swirling without scraping container sides/bottom leaves unmixed pockets. Mix thoroughly for the full recommended time.
Applied example: Bonding a hardwood threshold to a concrete doorstep.
Prep: Clean concrete with wire brush and TSP solution; rinse, dry completely. Lightly sand threshold bottom. Wipe both surfaces with alcohol.
Adhesive: Select a high-strength, flexible polyurethane construction adhesive (accommodates concrete/wood movement, waterproof).
Application: Apply continuous zig-zag bead to the concrete surface.
Clamping: Press threshold firmly. Use evenly distributed weights (sandbags, bricks)—not clamps that could damage wood. Wipe excess squeeze-out immediately.
Cure:* Keep dry and undisturbed 24 hours before light foot traffic; allow 72 hours for full strength development.
Navigating Complex Scenarios: Dissimilar Materials, Repairs, and Specialty Challenges
Real projects often involve imperfect conditions. This section addresses nuanced situations where standard guidance requires adaptation, emphasizing practical, safety-conscious strategies.
Bonding Challenging Plastics (PP, PE, Teflon)
Polypropylene (PP #5), polyethylene (PE #2, #4), and PTFE (Teflon) resist bonding due to low surface energy. Success requires methodical preparation and adhesive selection.
-
Surface Preparation is Essential:
- Mechanical abrasion: Sand thoroughly with 80–120 grit sandpaper until uniformly dull. Clean meticulously with isopropyl alcohol afterward.
- Chemical priming: Use a specialty plastic primer/etchant (e.g., Loctite 770, Permabond POP) per instructions. These micro-roughen the surface.
- Flame treatment (advanced/caution): Brief, even pass with propane torch (1–2 seconds) can oxidize the surface. Extreme caution: Test on scrap first; risk of melting/burning. Not recommended for beginners.
-
Adhesive Selection:
- Specialty systems: Loctite Plastics Bonding System (includes primer), Scotch-Weld DP8010 (with primer), or Permabond TA4610.
- Flexible epoxies: Some (like G/flex) adhere better to treated polyolefins than rigid epoxies.
- Avoid: Standard super glue, PVA, most silicones—they typically fail.
-
Repair example: Fixing a cracked polypropylene recycling bin.
- Clean area with soap/water, dry. Sand crack edges thoroughly. Wipe with alcohol.
- Apply plastic primer; let dry per instructions.
- Mix flexible epoxy thoroughly. Apply to one side. Clamp firmly with protective cauls. Wipe excess.
- Cure 24+ hours. Bond withstands handling and weather. For non-structural cracks, plastic welding may offer greater strength.
Repair Strategies by Damage Type
Repairs demand different approaches than new assembly—prioritizing function restoration while respecting the original object.
-
Ceramic/Pottery with Missing Pieces:
- Challenge: Replacing lost material while matching aesthetics.
- Approach: Use two-part epoxy putty (Milliput, Apoxie Sculpt) to fill voids. Knead equal parts, press into space, sculpt before set. Once cured, sand and paint. For bonding existing fragments, use clear, strong epoxy (Devcon 2-Ton) after meticulous alcohol cleaning. Use tape to hold pieces during cure.
-
Wood with Rotted Sections:
- Challenge: Soft wood provides no bonding foundation.
- Approach: Consolidate first. Inject low-viscosity epoxy consolidant (Git-Rot, CPES) into rotten area—it penetrates and hardens remaining fibers. After consolidation, fill voids with epoxy wood filler or putty. Then bond new wood using appropriate adhesive (epoxy or polyurethane for outdoor). Never glue new wood directly to soft rot.
-
Flexible Materials (Rubber, Vinyl, Leather):
- Challenge: Rigid adhesives crack when material flexes.
- Approach: Use adhesives that cure flexible. Rubber soles: Barge Cement or Shoe Goo. Vinyl upholstery: HH-66 vinyl cement. Leather: contact cement or specialized leather glue (Tandy Eco-Flo). Clean with alcohol. Apply thin coats to both surfaces, let become tacky per instructions, then press together firmly with even pressure—no sliding. Clamp or weight.
-
Clear Materials (Glass, Acrylic):
- Challenge: Visible glue lines; risk of stress cracking acrylic.
- Approach: Glass: Clear silicone (non-structural seals) or UV-curing adhesive (requires UV light). Acrylic: Use only adhesives explicitly labeled “safe for acrylic” (Weld-On #3, #4, #16). Standard super glue or epoxy may cause cracking. Solvent cements (Weld-On) weld pieces by melting surfaces—strongest bond. Requires precise capillary application and excellent ventilation.
Temperature Extremes: Beyond Standard Ranges
Standard adhesives have defined service temperature limits. Exceeding them risks failure.
-
High Heat (>250°F / 121°C):
- Applications: Exhaust components, brake parts, oven surrounds.
- Options: High-temp RTV silicone (Permatex Ultra Copper; handles 500–650°F intermittent) for gaskets/seals. Ceramic-based adhesives (J-B Weld ExtremeHeat) for extreme heat (1000°F+), often requiring heat curing.
- Critical: Impeccable metal cleaning with brake cleaner. Surface roughening. Thin, even application. Follow cure schedule precisely—many require gradual heat ramping.
-
Extreme Cold (<0°F / -18°C):
- Applications: Freezer repairs, Arctic-climate equipment.
- Options: Some toughened epoxies retain flexibility down to -40°F. Specialty silicones remain flexible below -60°F. Many polyurethanes perform well below -20°F.
- Critical: Most adhesives will not cure properly below 40°F (4°C). Warm components and adhesive to room temperature before application. Cure in a warm environment. Avoid adhesives prone to embrittlement in cold (standard epoxies, super glue).
Recognizing When Adhesive Isn’t the Primary Solution
Expertise includes knowing adhesive limitations. Forcing glue where other methods are superior risks failure or safety hazards. This section supports prudent judgment.
Structural and Safety Considerations
Engineering standards exist for critical applications. Ignoring them compromises safety.
-
Primary Structural Building Elements:
- Scenario: Joining load-bearing studs, rafters, or beams.
- Why adhesive alone is insufficient: Building codes (IRC, IBC) require mechanical fasteners (nails, screws, bolts) for primary structural connections. Adhesives alone cannot be reliably inspected, and long-term performance under dynamic loads (wind, seismic) in real-world conditions isn’t certified for sole reliance. Moisture and material movement introduce unpredictable stresses.
- Recommended approach: Use construction adhesive in conjunction with code-specified mechanical fasteners. Adhesive reduces noise and adds shear resistance, but fasteners carry the primary load. Consult local building codes and qualified professionals for critical applications. Industry resources (e.g., American Wood Council) detail approved adhesive/fastener combinations.
-
High-Impact or Safety-Critical Components:
- Scenario: Repairing bicycle frames, car suspension parts, ladder rungs, or child safety equipment.
- Why adhesive repair is inadvisable: These components endure extreme, unpredictable dynamic loads. Adhesive bonds can develop invisible micro-cracks under cyclic fatigue, leading to catastrophic failure. Safety margins are non-negotiable.
- Recommended approach: Replace the component. If repair is essential for irreplaceable items (e.g., vintage artifacts), it must be performed by certified professionals using approved methods (e.g., certified welding). DIY adhesive repair in these contexts carries significant risk.
-
Heavy Loads on Weak Substrates:
- Scenario: Mounting a heavy TV directly to drywall using adhesive alone.
- Why it fails: Drywall’s gypsum core is weak. Adhesives may bond to the paper face, but the core crumbles under sustained shear load. Even “heavy-duty” adhesives will eventually fail.
- Recommended approach: Mount brackets directly into wall studs using appropriate lag bolts. If studs are inaccessible, use a mounting plate secured across multiple studs, then attach the bracket to the plate. Toggle bolts may suit lighter loads, but adhesive alone is never sufficient for heavy, cantilevered loads on drywall.
Material and Practical Limitations
-
PTFE (Teflon) Bonding:
- Reality: PTFE has exceptionally low surface energy. No practical consumer adhesive creates a reliable, durable bond. Industrial methods (sodium etching, plasma treatment) are hazardous and inaccessible.
- Solution: Mechanical attachment (rivets, screws with oversized washers) is the only viable DIY approach. Accept that adhesive bonding isn’t feasible.
-
Silicone Rubber Bonding:
- Reality: Cured silicone has low surface energy and releases easily. Standard adhesives won’t adhere reliably.
- Solution: Requires specialty primer (e.g., Sil-Poxy) followed by compatible silicone adhesive. Often simpler to replace the part or use mechanical fastening.
-
Cost-Benefit Assessment:
- Scenario: Repairing a cracked polypropylene lawn chair.
- Adhesive path: Requires surface etching, specialty primer, flexible epoxy, meticulous clamping. Cost: $15+ materials, 2+ hours labor. Success isn’t guaranteed; bond may be visible.
- Alternative path: Replacement ($25–$50) or functional fix with heavy-duty zip ties.
- Judgment: For sentimental items, repair may be worthwhile. For inexpensive, mass-produced items, replacement is often the pragmatic choice. True resourcefulness includes evaluating effort versus outcome.
Safety and Workspace Preparation: Essential Practices
Adhesives involve chemicals requiring respectful handling. Safety is integral to successful, stress-free projects—not an afterthought.
Essential Personal Protective Equipment (PPE)
- Eye Protection: Safety glasses are essential. Chemical splash goggles are recommended when using solvents, sanding, or handling reactive adhesives.
- Skin Protection: Nitrile gloves (not latex—they degrade with solvents) prevent contact with irritants and sensitizers (e.g., epoxy hardeners). Long sleeves and pants minimize exposure. Barrier cream (e.g., Invisible Glove) adds incidental protection.
- Respiratory Protection:
- Ventilation first: Work outdoors or near an open window with a fan exhausting outward.
- Respirator: For prolonged use, strong fumes (epoxy, polyurethane), sanding dust, or confined spaces, wear a NIOSH-approved respirator with organic vapor cartridges and P100 particulate filters. Dust masks do not protect against chemical vapors. Check cartridge expiration.
- Hearing Protection: Required when using loud tools for surface preparation (grinders, sanders).
Workspace Setup
- Ventilation: Position fan to draw fumes away from your breathing zone and exhaust outdoors.
- Lighting: Use bright, shadow-free task lighting to see surface details, apply adhesive precisely, and spot contaminants.
- Organization:
- Clean surface: Cover workbench with wax paper, plastic sheeting, or cardboard.
- Tool readiness: Prepare all tools before opening adhesive: clamps, cauls, mixing sticks/cups, rags, solvents, sandpaper, tape, weights.
- Waste container: Use a dedicated metal can with lid for solvent-soaked rags (fire hazard—spontaneous combustion risk). Dispose per local regulations.
- Fire Safety: Many adhesives and solvents are flammable. Eliminate ignition sources (open flames, sparks). Keep a Class B fire extinguisher nearby. Store adhesives away from heat.
- First Aid Access: Include:
- Acetone or CA debonder for super glue on skin (soften gently—do not pull).
- Isopropyl alcohol for skin cleaning.
- Antiseptic wipes and bandages.
- Sterile eyewash solution. Know location of nearest emergency eyewash station.
Handling Specific Hazards
- Epoxy Sensitization: Repeated skin contact with epoxy components can cause lifelong allergic sensitivity. Always wear nitrile gloves. Wash skin immediately with soap and water if contact occurs. Use barrier cream under gloves for added protection.
- Isocyanates in Polyurethanes: Some contain isocyanates, potent respiratory sensitizers. Use only in well-ventilated areas; wear appropriate respirator if ventilation is limited. Choose low-isocyanate formulations when available (check SDS).
- Solvent Safety: Use acetone, mineral spirits sparingly in ventilated areas away from ignition sources. Store in approved containers. Never pour down drains.
- Hot Glue Guns: Nozzles and molten glue exceed 300°F (150°C). Use heat-resistant stands. Keep away from children/pets. Unplug when not in use. Have cold water nearby for minor burns (cool immediately 10+ minutes).
Environmental Responsibility
- Disposal: Never pour adhesives or solvents down drains.
- Water-based (PVA): Small amounts can dry solid in container, then dispose in trash.
- Solvent-based/chemical: Take to household hazardous waste (HHW) facility.
- Rags: Lay solvent-soaked rags flat to dry outdoors away from structures (prevents spontaneous combustion), then dispose in metal container. Prefer disposable paper towels.
- Minimize Waste: Purchase only needed quantities. Store adhesives properly (cool, dry place; some require refrigeration per label) to maximize shelf life. Seal containers tightly.
Your Questions, Answered
Q: What adhesive offers the highest strength for metal-to-metal bonding?
A: For properly prepared steel or aluminum under tensile or shear stress, high-strength two-part epoxies (e.g., J-B Weld SteelStik, Loctite E-30CL) typically provide the highest bond strength. However, “strongest” depends on specific metals, surface preparation, and stress type. For dissimilar metals or applications involving vibration/flexibility, a toughened epoxy or flexible polyurethane may deliver more durable real-world performance. Always abrade and clean metal surfaces with acetone before bonding.
Q: Can I use super glue (cyanoacrylate) on plastic? Which plastics work?
A: Compatibility depends entirely on the plastic type. Super glue bonds well to ABS, PVC, acrylic (PMMA), and polystyrene. It bonds poorly to polyethylene (PE #2, #4), polypropylene (PP #5), and Teflon without special primers. Check for a recycling symbol. When uncertain, test on an inconspicuous area or scrap piece first. For challenging plastics, use a “plastic bonder” formula with rubber tougheners or a specialty adhesive system designed for polyolefins.
Q: How long does epoxy take to cure? Can I speed it up?
A: Epoxy has two key phases: handling strength (when clamps can be removed, typically 4–8 hours) and full cure (maximum strength, usually 24–72 hours; some formulations take up to 7 days). You can moderately accelerate cure by increasing ambient temperature to 75–85°F (24–29°C), but never apply direct heat (hair dryer, heat gun)—this can cause bubbling, uneven cure, or weaken the bond. Always follow the manufacturer’s specified cure schedule for optimal results.
Q: Is wood glue (PVA) waterproof? Can I use it outdoors?
A: Standard white or yellow PVA wood glue is water-resistant (Type II), suitable for occasional moisture exposure like humidity or brief splashes, but not waterproof for constant wet conditions. For outdoor woodworking (deck furniture, garden structures), use an adhesive explicitly labeled waterproof (Type I), such as polyurethane glue (Gorilla Glue Original), marine epoxy, or specific waterproof PVA (Titebond III Ultimate). Even then, proper wood finishing (sealant, paint) is essential for long-term outdoor durability.
Q: Why did my epoxy bond fail despite using a “strong” product?
A: Epoxy failure usually stems from factors beyond the adhesive itself:
1. Inadequate surface preparation (oil, dust, smooth surfaces).
2. Incorrect mixing ratio (too much resin or hardener).
3. Incomplete mixing (unmixed pockets).
4. Surface contamination (moisture, release agents).
5. Starved joint (over-clamping squeezed out adhesive).
6. Curing in unsuitable conditions (cold, high humidity).
7. Stress mismatch (rigid epoxy used where flexibility was needed).
Review the Bond Integrity Framework steps—failure typically traces to substrate, environment, stress analysis, or application protocol.
Q: How do I remove old, dried adhesive?
A: Method depends on adhesive type and substrate:
PVA (Wood Glue): Soak with warm soapy water or vinegar; gently scrape with plastic tool. Sand residue.
Super Glue (CA): Apply acetone (nail polish remover) to cotton swab; hold on spot. Test first—acetone can damage some plastics/finishes. For skin, use acetone or CA debonder; peel gently after softening.
Epoxy/Polyurethane: Mechanical removal is primary: carefully scrape with razor blade (on glass/metal), sand, or use heat gun cautiously to soften (test first). Chemical removers exist but are harsh—use with extreme ventilation and caution.
Silicone: Cut bulk away with utility knife; use silicone sealant remover for residue.
Always test removal methods on a hidden area first to protect the substrate.
Q: Can I paint over cured adhesive?
A: Many cured adhesives accept paint with proper preparation:
Generally paintable: Construction adhesives (PL Premium), fully cured polyurethane (sanded smooth), epoxy (sanded), PVA (sanded).
Problematic: Standard silicone—most paints peel. Use “paintable silicone” if painting is required.
Critical step:* Lightly sand the cured adhesive surface with fine-grit sandpaper (220+) to create texture for paint adhesion. Wipe away all dust. Apply a primer compatible with the adhesive type before topcoating.
Q: Is hot glue suitable for anything beyond crafts?
A: Standard hot melt adhesive has limitations: low heat resistance (softens ~150°F/65°C), moderate bond strength, and reduced long-term durability. Its strengths are speed and ease. It can suit: temporary jigs/fixtures, bonding heat-sensitive materials (foam, some plastics) where liquids would cause damage, non-structural crafts, sealing cardboard. It is not recommended for structural applications, outdoor use (UV degrades it), high-heat environments, or bonds requiring long-term permanence. Specialty high-temp or structural hot melts exist but are less common for DIY.
Q: How do I bond glass to metal securely?
A: Success requires meticulous preparation and adhesive choice:
1. Clean both surfaces impeccably with isopropyl alcohol. Handle only by edges afterward.
2. Lightly abrade the metal surface with fine sandpaper; clean again.
3. Adhesive choice: For clear, strong bonds (glass shelf bracket), use clear high-strength epoxy (Devcon 2-Ton) or UV-curing adhesive (requires UV light). For flexible bonds needing vibration resistance (automotive trim), use high-strength silicone (Permatex Ultra Grey) or flexible polyurethane.
4. Apply thin, even layer. Clamp gently with protective pads to avoid cracking glass. Wipe excess immediately.
5. Cure fully per instructions before stressing. Avoid designs subject to peel stress at glass edges.
Q: What adhesive is safe for aquariums or food contact?
A: Critical: Never assume safety.
Aquariums: Use 100% silicone sealant explicitly labeled “Aquarium Safe” (e.g., Momentive RTV108). Standard bathroom/kitchen silicones contain anti-fungal additives toxic to aquatic life.
Food Contact: For incidental contact (e.g., wooden salad bowl repair), apply food-safe mineral oil finish after repair. For adhesives in food zones: Only use products with explicit NSF/ANSI Standard 51 certification. Most common DIY adhesives (epoxy, CA) are not food-safe once cured. When uncertain, replace the item. Safety is paramount.
Q: Why does my polyurethane glue foam excessively? How do I control it?
A: Polyurethane cures by reacting with moisture. Excessive foaming occurs with:
1. Too much surface moisture (over-dampening) or high humidity.
2. Excessive adhesive application.
To control foaming:
Lightly dampen only one surface per product instructions (some require no added moisture).
Apply a thin, even bead.
Clamp firmly—pressure suppresses foam expansion.
Work in moderate humidity (40–60%) if possible.
Wipe excess squeeze-out immediately* with damp cloth or mineral spirits. Slight expansion is normal and aids gap-filling; excessive foaming is messy but doesn’t necessarily weaken a properly clamped bond.
Q: Can I thin thick epoxy or glue for easier application?
A: Generally avoid thinning. Adding solvents (acetone, alcohol, mineral spirits):
Weakens the cured bond significantly.
May prevent proper curing.
Creates voids as solvent evaporates.
Alters critical properties (flexibility, heat resistance).
Exceptions: Some epoxy systems have manufacturer-approved thinning agents (check Technical Data Sheet). For thick adhesives, warm the container slightly in warm water (not hot) to temporarily reduce viscosity—safer than adding solvents. For gap-filling needs, select an adhesive specifically formulated for that purpose (thickened epoxy, polyurethane).
Conclusion and Next Step
Mastering adhesive selection cultivates a mindset of intentional craftsmanship. You now have a clear framework—the Bond Integrity Framework—to approach any bonding challenge with reasoned confidence. Remember the core sequence: decode substrates, map the environment, clarify forces, match chemistry, and execute the protocol. This isn’t about memorizing every product; it’s about developing the analytical habit to evaluate any scenario logically. This precision builds trust in your process and elevates every project you undertake.
Recap: Three Foundational Principles
- Substrate Awareness: Never bond blindly. Precisely identify materials and prepare surfaces meticulously—this forms the essential foundation.
- Environmental Honesty: Honestly assess where the bond will exist. Align adhesive properties with the specific thermal, moisture, UV, and chemical realities it will encounter.
- Stress Clarity: Visualize the forces acting on the bond. Select an adhesive whose strength profile (shear, peel, impact resistance) matches the dominant stress type.
The 24-Hour Rule: One Small, Impactful Action
Within the next day:
Examine your current or most recent project.
Apply Step 1 of the Framework: “What exactly are the two materials? What is their true surface condition?” Write it down.
Ask one follow-up: “Did I prepare this surface to bonding standard, or merely to looks clean* standard?”
This 60-second act of intentional observation builds the habit of substrate awareness—a practice that prevents more future failures than any single product recommendation.
The Broader Perspective: Adhesion as Craftsmanship
Adhesive selection reflects deeper making principles: keen observation (seeing material properties), systems thinking (understanding environment-stress-adhesive interactions), and respect for process (preparation over haste). Each successful bond reinforces patience. Each analyzed challenge becomes learning, not setback. Carry this framework beyond the workshop—into home maintenance, creative projects, and evaluating how things are made. You are no longer just choosing an adhesive; you are thoughtfully engineering connection. The next time you join two pieces, you’ll do so with clarity and confidence. Your bonds will perform reliably. Your projects will reflect enduring care. Your craftsmanship will speak through every detail.
Explore Our Complete System:
The Surface Preparation Handbook: From Rough to Ready for Any Finish | Wood Joinery Decoded: Matching Joints to Project Demands | Material Identification Guide: Recognizing Wood, Metal, and Plastic Confidently | Workshop Safety Essentials: Practical Protocols for Every Maker | The Finish Selection Framework: Protection and Beauty for Every Surface | Tool Maintenance Rituals: Preserving Performance and Longevity | Project Planning Method: From Vision to Execution with Confidence