From Acoustics to Aesthetics—Build a Cinematic Experience That Wows Without the Headache
Creating a home theater isn’t just about buying a big screen and speakers. It’s a thoughtful integration of design, technology, and human comfort where every element works in harmony to draw you into the story. This comprehensive guide walks you through every essential component with actionable steps, adaptable strategies, and solutions for real-world constraints—so you can build a media room that delivers genuine immersion, whether you’re working with a dedicated basement, a multi-use living space, or a modest budget. No fluff, no hype—just principles grounded in architectural standards, acoustic science, and documented patterns from diverse installations worldwide.
Introduction
You settle into your seat as the room gently darkens. The opening chords of a film score swell with clarity. Raindrops seem to fall above you. A whispered line of dialogue cuts through the silence with intimate precision. The image holds deep blacks and vibrant colors that feel alive. For a few hours, the outside world fades. This isn’t a luxury resort or commercial cinema—it’s the experience waiting within your own home. Yet for many, the path to this sanctuary feels shrouded in confusion. Online galleries showcase flawless media rooms with six-figure price tags. Forums overflow with technical jargon. Product reviews contradict each other. Critical questions linger: How large should my screen really be? What if my room has windows? Can I achieve great sound without covering every wall in foam?
The gap between aspiration and reality often stems from fragmented advice. Many resources focus narrowly on gear lists or aesthetic inspiration while overlooking the foundational physics of light and sound, human ergonomics, and the practical constraints of real homes. True immersion emerges not from the most expensive components, but from the intentional integration of five interconnected pillars: Layout & Sightlines, Acoustic Integrity, Lighting Control, Technology Integration, and Comfort & Aesthetics. This guide synthesizes widely recognized standards from organizations like THX, the Home Acoustics Alliance, and SMPTE with adaptable strategies for diverse spaces and budgets. Drawing on documented patterns from professional and DIY installations globally, we provide a clear, step-by-step framework to help you make confident, informed decisions—transforming uncertainty into excitement. Whether you’re sketching plans for new construction, optimizing an existing setup, or converting a spare room, this guide equips you with the knowledge to build a media room that delights for years to come.
The Immersion Blueprint: A Five-Pillar Framework for Media Room Excellence
Forget piecemeal checklists. Immersion—the visceral feeling of being inside the story—requires deliberate orchestration of five interdependent elements. Neglect one pillar, and the entire experience falters. A massive screen loses impact under glare. Premium speakers sound muddy in an untreated room. Plush seating becomes uncomfortable during a two-hour film if positioned poorly. The Immersion Blueprint moves beyond generic advice to address the why behind each recommendation, enabling you to adapt principles to your unique space, goals, and constraints. This isn’t about replicating a magazine photo; it’s about engineering an environment where technology serves human experience. Each pillar reinforces the others, creating a cohesive ecosystem where every detail—from the angle of a speaker to the warmth of ambient light—contributes to seamless storytelling.
Pillar 1: Layout & Sightlines – Engineering the Perfect View
Visual immersion begins long before the projector powers on. It starts with ergonomics: ensuring every seat offers an unobstructed, comfortable view of the entire screen without neck strain or eye fatigue. This pillar transforms abstract room dimensions into a precise viewing geometry grounded in cinematic science and human physiology.
Determining Screen Size and Viewing Distance: The Golden Ratios
Choosing screen size based solely on “what fits the wall” is a common oversight. Optimal immersion typically occurs when the screen fills approximately 30–40 degrees of your horizontal field of view—a range recommended by industry standards bodies like SMPTE and THX. This creates cinematic scale without forcing uncomfortable eye movement. A practical guideline: Viewing Distance (in inches) ÷ 1.5 to 2.0 = Ideal Screen Diagonal (in inches). For example, with primary seating 10 feet (120 inches) from the screen:
120 ÷ 1.5 = 80 inches
120 ÷ 2.0 = 60 inches
→ Recommended screen size range: 60–80 inches diagonal.
Why this range matters: Below approximately 26 degrees (a commonly cited THX reference point), the image may feel distant and lose emotional impact. Above 40 degrees, viewers may experience excessive eye movement, potentially causing fatigue. This calculation anchors your entire layout. Measure your room’s actual seating distance first—accounting for reclined positions—then select screen size. For multiple rows, calculate based on the closest row’s distance. Rear rows will naturally have a smaller viewing angle (20–25 degrees), which is generally acceptable and often preferred for comfort during extended viewing.
Real-world adaptation: In a 12×15 foot room with seating 9 feet back, the ideal screen spans roughly 54–72 inches. Choosing a 75-inch TV approaches the lower comfort threshold; a 65-inch model often sits comfortably within the recommended range. For projector setups targeting 100+ inch images, verify your throw distance aligns with the projector’s lens specifications—short-throw models excel in shallow rooms. Always prioritize comfort over maximum screen size.
Screen Height and Tilt: Aligning with the Human Eye
Mounting height is equally critical. The vertical center of the screen should align closely with seated eye level. For standard recliners or sofas, eye level typically ranges from 36 to 42 inches above the floor. Therefore:
– TV Mounting: Center of screen approximately 40 inches from floor.
– Projector Screen: Bottom edge 24–30 inches above floor (adjusting for screen aspect ratio).
The tilt test: Sit in your main seat. Close one eye. Does the screen center align with your open eye? If not, adjust. For very large screens (85+ inches) or tiered seating where rear rows are elevated, a subtle downward tilt (5–10 degrees) may reduce neck strain for front-row viewers. However, excessive tilting can distort geometry on flat panels and reduce projector lens efficiency. Avoid mounting screens above fireplaces—a persistent trend that forces upward gaze, often causing discomfort. If architectural constraints require higher placement, consider seating with deeper recline (lowering eye level) or select a projector with vertical lens shift to optically adjust the image position without tilting the projector.
Seating Arrangement: The Arc of Engagement
Straight rows perpendicular to the screen create optimal “sweet spots” only for center seats. Viewers on the sides may experience skewed visuals and imbalanced audio. The solution: a gentle curved arrangement mimicking professional cinemas. The ideal curve follows the arc of a circle centered on the main listening position (typically the middle seat of the primary row). For residential spaces, a radius of 10–15 feet often creates comfortable sightlines without consuming excessive floor area.
Critical spacing considerations:
– Row Depth: Minimum 24 inches between seat backs; 30+ inches recommended for power recliners (accounting for full recline extension).
– Aisle Width: Minimum 24 inches for safe, unobstructed passage.
– Seat Width: 22 inches minimum per seat; 24+ inches enhances comfort.
– Toe-In Adjustment: In narrow rooms where a full curve isn’t feasible, angle outer seats 10–15 degrees inward toward the screen. This simple tweak significantly improves viewing angles for side positions.
Multi-use room strategy: For spaces doubling as family rooms, prioritize modular seating—individual recliners or a sectional with movable chaise. Arrange the primary viewing cluster following sightline principles, while keeping secondary seating flexible. Use area rugs to define the “theater zone” visually and acoustically. Remember: immersion isn’t about filling every inch with seats; it’s about optimizing the experience for your typical audience size.
The Fundamental Principle: Immersion begins with physical comfort. If the viewer is straining their neck, squinting, or feeling cramped, even the most advanced technology becomes secondary. Every layout decision should prioritize the human body first.
Pillar 2: Acoustic Integrity – Sculpting Sound for Clarity and Impact
A visually stunning room falls flat if dialogue is buried under muddy bass, explosions lack definition, or footsteps echo unnaturally. Acoustic treatment is frequently misunderstood—it’s not about making the room “soundproof” (blocking sound from entering or escaping), nor is it about covering walls in inexpensive foam. True acoustic integrity means managing how sound behaves within the room to achieve balanced, accurate reproduction that serves the story. This pillar addresses three core challenges: controlling reflections, managing bass frequencies, and mitigating external noise—transforming chaotic sound waves into precise, emotional storytelling.
Understanding Room Acoustics: Reflections, Absorption, and Diffusion
Sound waves radiate from speakers and bounce off hard surfaces (walls, floors, ceilings, windows). These reflections arrive at your ears milliseconds after the direct sound, potentially causing interference that blurs dialogue, smears stereo imaging, and creates areas of harshness. Early reflections (arriving within approximately 20 milliseconds) are particularly impactful on clarity. The goal isn’t a “dead” room (which can feel unnatural and fatiguing) but a balanced one where problematic reflections are managed while preserving a sense of space.
Mapping reflection points—the mirror trick:
1. Sit in your main listening position.
2. Have a helper slide a hand mirror along the side walls.
3. Mark any spot where you see a speaker’s tweeter reflected in the mirror.
4. Repeat for ceiling, front wall (behind speakers), and rear wall.
These marks indicate priority zones for treatment. For side walls, absorption panels (2–4 inches thick) placed at reflection points are often effective. For ceilings, a suspended “cloud” panel above the seating area can absorb overhead reflections. The front wall may benefit from absorption behind speakers to prevent sound bouncing back; the rear wall often uses diffusion to scatter energy evenly without eliminating ambience.
Material considerations: Thin, egg-crate foam (common in budget kits) primarily absorbs high frequencies, leaving mid-bass reflections largely unaffected and potentially creating an unnaturally “bright” sound. Effective treatment typically requires dense, porous materials:
– Rigid Fiberglass (e.g., Owens Corning 703/705): Widely used in professional applications. Absorbs broadly across frequencies when 2+ inches thick.
– Mineral Wool (e.g., Rockwool Safe’n’Sound): Comparable performance profile, often more accessible.
– Fabric Wrapping: Use acoustically transparent fabric to maintain aesthetics without significantly blocking sound.
For diffusion, quadratic residue diffusers (QRDs) scatter sound waves mathematically, preserving room liveliness while reducing echoes—often suitable for rear walls in rooms over 300 sq ft.
Budget-conscious path: Start with reflection points and corners. DIY panels using rigid fiberglass and fabric can be cost-effective versus retail options. Place them strategically before expanding. Even two well-placed panels at first-reflection points can yield noticeable improvements in dialogue clarity.
Taming the Beast: Bass Management and Room Modes
Low frequencies (20–200 Hz) present unique challenges. They can build up in room corners and along walls due to standing waves (room modes), causing uneven bass response—boomy in some seats, weak in others. This is a fundamental acoustic phenomenon; no equalizer alone can fully resolve severe room mode issues.
Bass traps are highly recommended: Place broadband bass traps in vertical corners (floor-to-ceiling). These are dense absorbers (minimum 4 inches thick, ideally 6+ inches) targeting low frequencies. Don’t overlook horizontal corners (wall-ceiling, wall-floor). In a rectangular room, focus on the front two corners first (where speakers energize modes most), then add rear corners. For persistent issues, membrane traps (tuned to specific problem frequencies) offer targeted solutions but typically require measurement tools for effective deployment.
Subwoofer strategy—the crawl method:
1. Place your subwoofer in the main listening seat.
2. Crawl slowly along the front wall (and side walls near corners).
3. Listen for where bass sounds fullest, smoothest, and most even.
4. That spot becomes your subwoofer location.
This technique helps identify room modes empirically. For enhanced results, using two identical subwoofers placed symmetrically (e.g., front left and right corners) can help create more consistent bass response across multiple seating positions. Modern AV receivers with advanced room correction (Audyssey MultEQ XT32, Dirac Live) can further refine integration—but physical treatment forms the essential foundation. Software correction has limits with severe acoustic issues; absorption addresses the root cause.
Real-world example: In a typical rectangular room, strategic placement of bass traps in corners combined with dual subwoofers often leads to a more balanced low-frequency experience across all seats. The difference can be transformative: bass feels powerful yet controlled, enhancing emotional impact without overwhelming specific locations.
Sound Isolation: Keeping the Noise In (and Out)
If your media room shares walls with bedrooms, offices, or living areas, sound isolation helps prevent disturbances. Crucially, isolation (blocking sound transmission) is distinct from acoustic treatment (managing internal sound). Isolation typically requires adding mass, decoupling structures, and sealing air gaps—the “weak links” where sound leaks.
Prioritized isolation considerations:
1. Doors: Replacing hollow-core doors with solid-core options (minimum 1.75 inches thick) and adding perimeter seals can significantly reduce sound transmission. Automatic door bottoms (drop seals) provide effective sealing at the threshold.
2. Windows: Adding secondary glazing or heavy blackout curtains with thermal backing offers practical improvement. For new construction, laminated glass is an option.
3. Walls/Ceiling: In new builds, techniques like resilient channels, double drywall layers with damping compound, and insulated stud cavities are common. For existing rooms, adding mass-loaded vinyl (MLV) under drywall or flooring may be considered.
4. Gaps: Sealing penetrations (electrical outlets, baseboards, HVAC vents) with acoustic caulk addresses critical leakage points. Even small gaps can notably reduce isolation effectiveness.
Practical reality check: Comprehensive isolation often involves construction and cost. For most homeowners, focusing on doors, windows, and gaps offers meaningful improvement with reasonable effort. A tube of acoustic caulk applied around outlets and baseboards is a low-cost step. Heavy curtains over windows serve dual purposes: light control and modest sound absorption. Remember: isolation protects others from your theater; treatment protects your experience from the room’s acoustics. Both matter, but treatment often delivers more immediate sonic benefits for the listener.
Pillar 3: Lighting Control – Crafting the Cinematic Atmosphere
Light is a critical factor in image quality. Even minimal ambient light reflecting off the screen can reduce perceived contrast, wash out blacks, and diminish color saturation—lessening the impact of HDR content. However, total darkness isn’t always practical or safe. The goal is intentional lighting: eliminating glare while providing subtle, warm illumination for safety, comfort, and mood. This pillar transforms lighting from an afterthought into an active component of immersion.
Eliminating Screen Glare: The Primary Battle
Begin with a careful assessment of all potential light sources: windows, doors, HVAC vents (reflective surfaces), LED indicators on equipment, and light seeping under doors. Each should be addressed systematically.
Windows—the most common challenge:
– Blackout Curtains: Choose tightly woven fabric with thermal backing. Install rods extending several inches beyond the window frame to minimize edge leakage. For seamless operation, motorized shades integrated with your media system offer convenience.
– Roller Shades: Recessed into ceiling pockets provide a clean look. Opt for “blackout” or “room darkening” fabric with high opacity ratings.
– Ambient Light Rejecting (ALR) Screens: For projector setups where total darkness isn’t feasible, ALR screens use optical layers to reflect projector light while absorbing ambient light from above/sides. Important consideration: ALR screens often have narrower optimal viewing angles. They work best with controlled overhead light but are less effective under direct window glare. Physical light blocking generally provides more reliable results.
Equipment glow: Cover LED indicators on AV components with removable black tape or adhesive covers. For equipment racks, consider solid doors or blackout liners. Even faint glows from power strips can be distracting during dark scenes—test your room in complete darkness to identify every light source.
Ambient Lighting: Safety and Mood Enhancement
Complete darkness can cause disorientation when moving and may strain eyes during long sessions. Strategic ambient lighting solves this without compromising contrast. Key principles: indirect, dim, warm-colored, and controllable.
Layered lighting strategy:
– Bias Lighting (Behind Screen): Install LED strips (neutral white, ~6500K) along the back edge of the screen or frame. Set to low brightness (10–15%). Research suggests this can reduce eye strain by providing a stable luminance reference and may enhance perceived contrast.
– Pathway Lighting: Recessed low-voltage LED step lights along aisles or under seating platforms. Use warm white (2700K–3000K) at minimal brightness—just enough to see edges safely.
– Cove Lighting: LED strips hidden in ceiling valances or wall ledges, casting a soft upward glow. Avoid direct downward light.
– Task Lighting: Small, dimmable wall sconces near exits for emergency use.
Color temperature matters: Cool white/blue light (4000K+) can disrupt night vision, feel clinical, and counteract cinematic mood. Warm white (2700K–3000K) supports relaxation. For bias lighting specifically, neutral white (~6500K) aligns with standard display color temperatures. All fixtures should be on dimmers—ideally integrated into your media control system for seamless operation.
Smart Lighting Integration: Seamless Control
Automation ensures optimal lighting becomes effortless. When you start playback, the system can:
– Dim or turn off ambient lights
– Activate bias lighting at a preset level
– Close motorized shades
– Illuminate pathway lights at low brightness
Systems range from accessible (smart plugs + IR blasters synced to AV receiver triggers) to comprehensive (dedicated home automation platforms). Even basic setups yield benefits: a smart plug linked to your receiver’s trigger output can power down a lamp automatically. For enthusiasts, open-source platforms enable custom scenes (“Movie Mode,” “Intermission”). The psychological benefit is meaningful: consistent lighting conditions help train your eyes to expect cinematic quality, deepening immersion over time.
Pillar 4: Technology Integration – Selecting and Positioning Core Components
Technology choices should serve your room’s physical realities and viewing habits—not dictate them. This pillar focuses on informed decisions about displays, audio systems, and sources, emphasizing compatibility with your layout, acoustics, and lighting constraints. Prioritize components that integrate smoothly into the Immersion Blueprint rather than chasing incremental specifications.
Display Technology: Projector vs. Large-Format TV – A Decision Framework
This choice has no universal winner. The right path depends entirely on your room’s light control, dimensions, content preferences, and budget. Use this diagnostic framework:
| Factor | Projector Path | Large-Format TV Path |
|---|---|---|
| Room Light Control | Works best in near-total darkness. ALR screens help but have limitations. | Tolerates moderate ambient light better. OLED excels in dark rooms; high-brightness LED handles variable light. |
| Ideal Screen Size | 100+ inches feasible for true cinematic scale. | Practical limit: 85–100 inches (cost and weight increase significantly beyond). |
| Room Dimensions | Requires sufficient throw distance (check projector specs). Short-throw models suit shallow rooms. | Mounting requires structural support for heavy sets (85″+ TVs are substantial). |
| Primary Content | Ideal for movies in controlled light. HDR performance continues to improve. | Versatile: movies, gaming (low input lag), sports. OLED offers deep blacks; Mini-LED delivers high brightness. |
| Installation Complexity | Higher: screen selection, precise alignment, potential lift/cabinet. | Lower: wall mount, cable management. Generally plug-and-play. |
| Budget Considerations | Entry: ~$1,500 (1080p). Premium: $5,000+ (4K laser). + Screen ($300–$2,000). | Entry: ~$1,200 (75″ LED). Premium: $3,500 (83″ OLED). Mounting costs minimal. |
| Maintenance | Laser light sources: long lifespans. Lamp projectors: periodic replacement. | Minimal maintenance. OLED burn-in risk is low with normal, varied content usage. |
Decision flow:
1. Can you achieve good light control? (If not, TV path is often more practical)
2. What is your max viewing distance? (Use Pillar 1 formula; if ideal size >85″, projector may be necessary)
3. What content dominates? (HDR movies in dark room → OLED or high-end projector; mixed use in variable light → bright LED TV)
4. What’s your total display budget? (Include screen, mount, potential lift)
Critical nuance: For projector users, screen gain matters. A 1.0–1.3 gain screen provides wide viewing angles ideal for multiple seats. High-gain screens (>1.5) boost brightness but narrow the optimal viewing area—avoid unless seating is tightly clustered. For TVs, panels with anti-reflective coatings are advantageous if any ambient light persists.
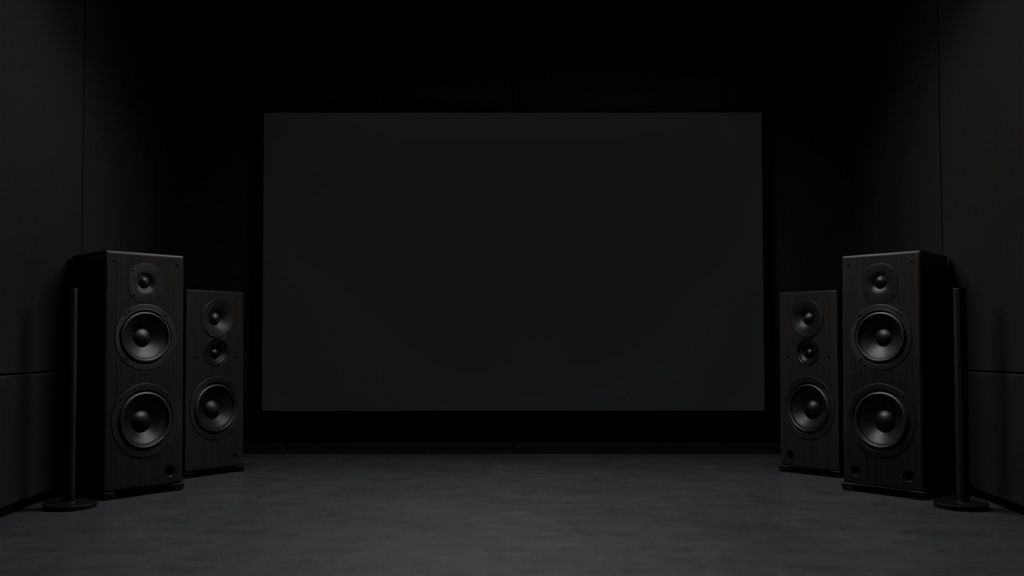
Audio System: Surround Sound Formats and Speaker Selection
Immersive audio significantly enhances the theater experience. Moving beyond soundbars or stereo to a multi-channel system unlocks modern object-based formats like Dolby Atmos and DTS:X, where sounds move precisely in 3D space—rain falling from above, helicopters circling overhead.
Speaker placement considerations (aligned with Dolby guidelines):
– Front L/C/R: The center channel handles most movie dialogue—prioritize quality here. Mount all three at seated ear height (36–42″), tweeters aimed toward the main seat. Center speaker directly below/above screen.
– Surrounds (Side/Rear): Side surrounds at 90–110 degrees from center, 2–3 feet above ear level. Rear surrounds (for 7.1) directly behind seating area. Direct-radiating speakers are generally preferred for precise localization with modern discrete channels.
– Height Channels (Atmos): In-ceiling speakers are ideal. If ceiling installation isn’t feasible, upward-firing modules on front/surround speakers can be effective. Important: Ceiling should be flat, reflective (not acoustic tile), and 8–10 feet high for reflections to work well. Test with temporary placement before permanent install.
AV Receiver (AVR) selection considerations:
– Channels: Match your speaker count (e.g., 9.2 channels for 5.1.4 setup).
– Room Correction: Features like Audyssey MultEQ XT32 (Denon/Marantz) or Dirac Live (Anthem, Arcam) are valuable for optimizing sound in your specific room.
– Power: Check continuous (RMS) wattage per channel. Adequate power ensures headroom.
– Future-Proofing: HDMI 2.1 ports support features like 4K/120Hz, 8K passthrough, VRR/ALLM for gaming.
– Build Quality: Heavier units often indicate robust internal components.
Budget-smart sequencing:
1. Start with a high-quality center channel speaker + subwoofer (foundational for dialogue clarity and impact).
2. Add front left/right speakers matching the center tonally.
3. Integrate surrounds and height channels later.
4. Upgrade AVR last—many mid-tier models offer robust feature sets.
Source Components and Cable Management
Streamers, disc players, and game consoles should output the highest quality signal your display supports. Prioritize:
– Universal Disc Player: Ensures compatibility with Blu-ray, 4K UHD, DVD collections.
– Streaming Box: Reliable 4K HDR/Dolby Vision support (e.g., Apple TV 4K, NVIDIA Shield).
– Gaming: Consoles with HDMI 2.1 features for high-frame-rate gaming (PS5, Xbox Series X).
Cable management philosophy: “If you see cables, the design feels unfinished.” During construction, running conduit through walls allows for future upgrades. In existing rooms:
– Use braided sleeves or paintable cable raceways along baseboards.
– Label every cable at both ends for easy identification.
– Centralize equipment in a ventilated rack (quiet fans are essential—components overheat in enclosed cabinets).
– For long HDMI runs (>25 ft), active or fiber optic HDMI cables help maintain signal integrity.
IR repeaters or RF remotes ensure control with equipment doors closed. This attention to detail prevents frustration and maintains the room’s aesthetic integrity.
Pillar 5: Comfort & Aesthetics – The Human Element
Technology and acoustics create the foundation, but comfort and aesthetics determine whether people choose to spend time in the room. This pillar transforms a technical space into a welcoming sanctuary where every detail—from seat cushion density to wall texture—supports relaxation and connection. Immersion isn’t just sensory; it’s emotional.
Seating: Engineering for Extended Comfort
Theater seating is a significant investment where thoughtful selection pays dividends. Prioritize features aligned with ergonomic principles:
– Recline Mechanism: Power recline (quiet motors) is often preferred. Ensure the fully reclined position doesn’t obstruct rear views—calculate “throw distance” (how far the seat extends backward).
– Cushioning: High-resilience foam maintains shape over time. Memory foam toppers add luxury but may retain heat for some users.
– Dimensions: Seat depth 20–22 inches; width 22+ inches per seat. Armrests should accommodate drink holders comfortably.
– Materials: Top-grain leather ages well and cleans easily. Performance fabrics offer stain resistance with a cozy feel. Avoid materials that feel cheap or uncomfortable over time.
– Tiered Platforms: For dedicated rooms with multiple rows, build sturdy risers (plywood over framing) covered in carpet. Include step lighting recessed into the front edge. Platforms must be rigid—no squeaking or flexing.
Budget-conscious alternatives:
– High-quality recliners from furniture retailers arranged in a gentle curve.
– Sectional sofas with chaise lounges—position the chaise away from the screen to avoid blocking views.
– Add custom cup holder trays that attach to armrests.
Comfort is subjective: test seats for 15+ minutes in-store. Sit, recline, adjust. Your body provides the best feedback.
Climate Control and Air Quality
A full media room generates heat (people, electronics) and can become stuffy. Poor air quality distracts from immersion. Solutions:
– HVAC: Ensure adequate airflow. If the room is isolated, a ductless mini-split provides precise temperature control without disruptive noise.
– Air Purification: HEPA air purifiers remove dust and allergens—particularly helpful for basement rooms. Place units away from seating to avoid fan noise.
– Humidity Management: Maintain 40–60% relative humidity with a quiet dehumidifier (basements) or humidifier (dry climates). This protects electronics, wood furniture, and supports vocal comfort.
– Ventilation: For tightly sealed rooms, an energy recovery ventilator (ERV) can introduce fresh air without losing conditioned temperature. Seasonal considerations matter: humidity control is especially important in summer months for basement spaces.
Thematic Design and Personalization
Decor sets the emotional tone. Dark, non-reflective colors enhance contrast, but the room should feel inviting, not oppressive.
– Walls/Ceiling: Flat or matte finish paint in deep charcoal, navy, or burgundy. Avoid pure black—it can feel cave-like and shows dust prominently. Test large samples under your actual lighting.
– Acoustic Panels as Art: Custom-wrap panels in fabric matching your color scheme. Print movie posters, family photos, or abstract art on acoustically transparent material.
– Display Elements: Floating shelves for collectibles. Backlit display cases with UV-filtering glass protect items while adding ambient glow.
– Ceiling Treatments: Fiber optic “star ceilings” create magical pre-show ambiance. Install with dimmer control.
– Doors: Solid-core doors with seals provide acoustic benefits and a premium feel. Add subtle LED strip lighting along the bottom edge for pathway guidance.
The goal is cohesion: every design choice should support immersion without demanding attention. A well-executed media room feels intentional, personal, and effortlessly comfortable—a space you’re proud to share.
Navigating Real-World Challenges: Solutions for Imperfect Spaces
No home offers a perfect blank canvas. Constraints—budget, architecture, multi-use demands—are universal. This section provides targeted strategies for common scenarios, proving that thoughtful adaptation beats idealized plans every time. The Immersion Blueprint is flexible; its principles apply regardless of room shape or resources.
Challenge 1: The Multi-Use Room (Living Room, Family Room, Den)
The Reality: You cannot install permanent blackout shades, tiered seating, or floor-to-ceiling acoustic panels. The room must function daily as a living space.
Solutions:
– Display Strategy: Choose a high-brightness OLED or premium LED TV with anti-reflective coating. Mount on a full-motion arm to adjust viewing angle away from windows. For projectors, a retractable screen that disappears into the ceiling when not in use maintains room functionality.
– Audio Compromise: A high-quality soundbar system with wireless surrounds and subwoofer can deliver surprisingly immersive effects without floor-standing speakers. Position the subwoofer in a front corner; place rear speakers on shelves behind seating. When not in use, the system blends seamlessly.
– Lighting Adaptation: Install smart bulbs in existing lamps. Create a “Movie Mode” scene that dims all lights to low, warm white. Use blackout roller shades on windows that can be pulled down only during viewing—store them rolled up discreetly.
– Acoustic Tweaks: Place thick, plush area rugs to reduce floor reflections. Hang heavy curtains over windows (dual-purpose: light control and absorption). Position bookshelves filled with books on reflective side walls—books act as natural diffusers. Add throw blankets and pillows to soft furnishings to absorb mid/high frequencies.
– Psychological Boundary: Use area rugs and strategic furniture arrangement to visually define the “theater zone.” When the shades are down and lights dimmed, the room psychologically shifts purpose.
Key Mindset: Prioritize reversible, non-invasive changes. The goal isn’t perfection—it’s meaningful improvement within constraints. Even reducing ambient light significantly and adding a quality center-channel speaker elevates the experience noticeably.
Challenge 2: The Small or Oddly Shaped Room (Under 200 sq ft, L-Shaped, Sloped Ceiling)
The Reality: Limited space complicates seating arrangements, speaker placement, and can exacerbate bass issues due to room modes.
Solutions:
– Layout Focus: Prioritize a single optimal “sweet spot” seating position. Use compact, wall-mounted seats or high-back armchairs. Calculate screen size carefully—oversizing causes eye strain. A 55–65 inch screen is often ideal for small rooms.
– Acoustic Priority: Bass trapping becomes more critical, not less. Small rooms often have pronounced room modes. Install thick bass traps in all vertical corners (floor-to-ceiling). Focus absorption panels on primary reflection points identified via the mirror trick. Even in tight spaces, strategic treatment yields disproportionate benefits.
– Technology Adaptation: Short-throw projectors create large images from 3–5 feet away—ideal for shallow rooms. For audio, in-wall or in-ceiling speakers save floor space, but ensure proper backboxes are installed for acoustic isolation. Upward-firing Atmos modules work well if ceiling height is adequate (8+ feet).
– Shape Challenges: For L-shaped rooms, position seating in the longer leg facing the screen. Use the shorter leg for equipment storage or a small lounge area. For sloped ceilings, mount height speakers on the highest wall section where sound reflects effectively. Avoid placing seating directly under the slope’s lowest point.
– Visual Trickery: Paint walls and ceiling the same dark, matte color to minimize perception of awkward angles. Use indirect cove lighting to draw eyes upward, creating a sense of height.
Pro Insight: A well-treated small room can deliver a more intimate and immersive experience than a large, untreated space. Intimacy enhances emotional connection to content. Embrace the coziness—add plush textures, warm lighting, and personal touches to make the space feel intentional.
Challenge 3: Budget Constraints (Phased Approach for Maximum Impact)
The Reality: Limited funds require intelligent sequencing to avoid wasted spending.
Solutions:
– Phase 1: Foundation (Months 1–3)
– Measure room precisely; sketch layout using Pillar 1 guidelines.
– Address critical light leaks: blackout curtains for windows, covers for equipment LEDs.
– Acquire core audio: high-quality center channel speaker + subwoofer.
– Why first? Dialogue clarity and bass impact are the most noticeable upgrades. Light control immediately improves image quality.
– Phase 2: Experience (Months 4–9)
– Add front left/right speakers matching the center channel.
– Install DIY acoustic panels at first-reflection points and bass traps in two front corners.
– Upgrade seating: one high-comfort recliner for the main position.
– Why next? Completes the front soundstage. Treatment refines what Phase 1 started.
– Phase 3: Immersion (Months 10–18)
– Add surround speakers and height channels.
– Expand acoustic treatment (rear wall, ceiling cloud).
– Implement smart lighting control and pathway lighting.
– Why last? These elements deepen immersion but rely on a solid foundation.
– Smart Sourcing Tactics:
– Buy open-box or refurbished AV equipment from authorized dealers.
– Consider previous year’s TV/projector models—they often offer strong performance at reduced cost.
– Build acoustic panels yourself: rigid fiberglass + fabric + wood frame.
– Source seating from liquidation auctions or furniture outlets with floor models.
– Critical Avoidance: Do not buy a massive screen before confirming viewing distance. Do not prioritize matching speaker sets over center channel quality—dialogue clarity is paramount.
Budget Reality Check: A deeply satisfying media room is achievable under $3,000 by focusing on pillars: display, core audio, light control, and basic treatment. Perfection is the enemy of progress—start where you are.
Your Questions, Answered
Q: What is the single most impactful upgrade for an existing media room?
A: Industry experience indicates that adding proper acoustic treatment—specifically broadband bass traps in vertical corners and absorption panels at primary reflection points—often delivers the most noticeable improvement in sound quality. Muddy bass and harsh reflections are common immersion barriers. If light control is poor (e.g., untreated windows), addressing that ranks very highly. Focus on these foundational elements before upgrading electronics.
Q: Can I use regular living room furniture instead of dedicated theater seats?
A: Absolutely—and often wisely. Comfort is deeply personal. High-quality recliners, a deep sectional, or well-padded armchairs can work exceptionally well, especially in multi-use rooms. Focus on arranging them to follow sightline principles (gentle curve, proper distance from screen, eye-level alignment). Add throw blankets, lumbar pillows, and custom cup holder trays for theater-like convenience. The emotional connection to familiar, comfortable furniture often enhances enjoyment more than specialized seating.
Q: How dark does the room need to be for a projector to work well?
A: For optimal image quality with standard white screens, significant light reduction is essential. However, modern high-lumen laser projectors paired with ambient light rejecting (ALR) screens can tolerate controlled ambient light—such as dimmed bias lighting or light from an adjacent room with the door closed. Direct light hitting the screen (from windows or lamps) will degrade contrast and color. If you cannot achieve meaningful light reduction, a high-brightness TV is often a more practical choice. Test your room at night with all lights off; address any visible light sources first.
Q: Is Dolby Atmos worth implementing in a small room (under 200 sq ft)?
A: Yes, with managed expectations. In compact spaces, overhead effects may feel less spatially discrete than in large rooms, but Atmos content is mixed with height channels in mind. Even subtle overhead cues (rain, aircraft) enhance immersion compared to traditional 5.1. If ceiling installation isn’t feasible, upward-firing modules are a viable alternative provided your ceiling is flat, reflective, and 8–10 feet high. Prioritize getting your base 5.1 system well-set up first—Atmos is an enhancement, not the foundation.
Q: What paint finish and color are truly best for media room walls?
A: Flat or matte finish is essential—any sheen (eggshell, satin) reflects light and reduces contrast. Color should be a deep, neutral tone: charcoal gray, navy, or chocolate brown. Avoid pure black—it can feel oppressive, shows dust prominently, and may make the room feel smaller. Test large paint samples (2×2 ft) on multiple walls under your actual lighting conditions. The front wall (behind screen) should be the darkest; side/rear walls can be slightly lighter but still non-reflective. Walls should recede visually, putting focus entirely on the screen.
Q: How can I hide wires and equipment without major construction?
A: In existing rooms:
– Run cables along baseboards inside paintable raceways.
– Use braided cable sleeves for grouped wires; secure with adhesive clips.
– Place equipment in a ventilated media console with louvered doors (allows airflow while hiding components).
– For long HDMI runs, use active cables rated for the distance.
– Label every cable at both ends.
If renovating, running conduit through walls is a highly recommended step—it’s inexpensive during construction and invaluable for future upgrades. Avoid running power and signal cables parallel in the same conduit; separate them to prevent potential interference.
Q: What screen aspect ratio should I choose: 16:9 or 2.35:1 (Cinemascope)?
A: For most home theaters, 16:9 is the practical choice. It matches HDTV broadcasts, streaming content, gaming consoles, and most Blu-rays. While many films are shot in wider ratios (2.35:1), modern players and projectors handle letterboxing seamlessly. Constant-height 2.35:1 screens with motorized masking panels offer a premium cinema experience but add significant cost and complexity. Only pursue this path if:
– You watch almost exclusively widescreen movies
– Budget allows for masking system or anamorphic lens
– You accept black bars during non-widescreen content
For most users, a high-quality 16:9 screen delivers versatility without compromise.
Q: Do I need to hire a professional calibrator for my display?
A: For enthusiasts seeking absolute color accuracy (e.g., filmmakers, videophiles), professional calibration can be valuable. However, for the vast majority of viewers, it’s unnecessary. Modern displays include excellent out-of-the-box presets:
– Select “Cinema,” “Filmmaker Mode,” or “ISF Day/Night”
– Disable motion smoothing (“Soap Opera Effect”)
– Set contrast/brightness using a calibration disc (free options available)
– Use your AVR’s room correction for audio
Professional calibration is a refinement, not a requirement for a stunning experience. Prioritize acoustic treatment and light control first.
Q: How critical is the room correction software in my AV receiver?
A: Very valuable—especially in non-ideal rooms. Software like Audyssey MultEQ XT32 or Dirac Live measures speaker distances, levels, and frequency response at multiple seating positions, then applies corrective filters. It cannot fix severe acoustic issues (like standing waves), but it significantly improves:
– Dialogue clarity by balancing channel levels
– Subwoofer integration (crossover points, phase)
– Compensation for seating position variances
Always run calibration meticulously: use the provided mic stand, follow placement instructions exactly, and perform measurements in a quiet room. This step often elevates system performance more than hardware upgrades.
Q: Are basements ideal for media rooms? What special considerations exist?
A: Basements offer inherent advantages: minimal windows (easier light control), separation from main living areas (sound isolation), and typically rectangular shapes. However, address these critical factors:
– Moisture Control: Install a dedicated dehumidifier and monitor humidity year-round. Seal foundation cracks. Seasonal humidity fluctuations are common.
– Egress Safety: Ensure windows meet local building code requirements for emergency exits.
– Flooring: Concrete slabs transmit footfall noise. Install thick carpet with dense padding over a moisture barrier.
– Ceiling Height: Verify minimum clearance after adding acoustic clouds or star ceilings.
– Ventilation: Basements can feel stuffy. Add an ERV or ensure HVAC ducting serves the space adequately.
With these addressed, basements provide one of the most cost-effective canvases for a dedicated media room.
Q: Can I integrate gaming seamlessly into a media room designed for movies?
A: Absolutely—and modern technology makes this easier than ever. Key considerations:
– Display: Choose a TV/projector with HDMI 2.1 ports supporting 4K/120Hz, VRR, and ALLM. OLED panels offer fast response times.
– Audio: Ensure your AVR has a dedicated “Game” mode that minimizes processing delay. Some Atmos games use object-based audio effectively.
– Lighting: Program a “Game Mode” scene that activates subtle bias lighting (reduces eye strain) and pathway lights for safety.
– Seating: Prioritize chairs with good lumbar support for extended play. Avoid deep recline that hinders controller access.
– Cable Management: Use a dedicated HDMI port labeled for gaming console; store controllers nearby.
The Immersion Blueprint enhances gaming—precise sound localization helps hear footsteps, optimal sightlines reduce motion sickness. Design for movies first; gaming benefits inherently.
Conclusion and Your Next Step
Designing a media room is more than a technical project—it’s an act of crafting a sanctuary for connection, wonder, and shared experience. By anchoring your decisions in the five pillars of the Immersion Blueprint, you move beyond overwhelming choices to create a space where every detail serves a purpose. Remember: perfection is not the goal. Thoughtful progress is. Every room has constraints, but each challenge invites creative solutions uniquely suited to your life. The most celebrated media rooms aren’t those with the highest price tags; they’re the ones where families gather for movie nights, friends laugh during comedies, and individuals find respite in cinematic artistry. This is the true measure of success.
Recap: The Three Foundational Priorities
- Sightlines First: Calculate screen size and seating distance before purchasing anything. Physical comfort is the bedrock of immersion—without it, technology fades into irrelevance.
- Treat the Acoustics Early: Invest in bass traps and reflection-point absorption before upgrading speakers. Sound quality shapes emotional engagement profoundly.
- Control the Light Relentlessly: Eliminate glare on the screen. Even modest improvements in light management yield dramatic gains in image depth, color, and perceived resolution.
The 24-Hour Rule: Your Tiny, Powerful First Step
Within the next 24 hours, take one concrete action. Do not research further. Do not browse products. Simply measure your room. Grab a tape measure and write down:
– Exact length, width, and height (in feet and inches)
– Locations of doors, windows, and electrical outlets
– Distance from intended screen wall to primary seating position
– Ceiling type (flat, sloped, height variations)
This single act transforms the project from an abstract dream into a tangible plan. With these measurements, you can accurately apply the screen size guideline, assess acoustic challenges, and begin sketching a layout. Momentum begins with measurement. Clarity follows action.
The Big Picture: More Than a Room
A thoughtfully designed media room becomes a backdrop for memories. It’s where children experience Star Wars for the first time with wide eyes. Where couples celebrate anniversaries with a favorite film. Where friends gather for playoff games under perfect lighting. By focusing on human experience at every decision point—prioritizing comfort over specs, connection over complexity—you’re not just installing equipment. You’re investing in moments of joy, shared laughter, and quiet awe. Start with your measurements tomorrow. Take that first step. Your dream media room isn’t a distant fantasy; it’s a series of intentional choices waiting to be made. Begin today.
Explore Our Complete Home Entertainment System:
Designing the Perfect Listening Room for Audiophiles | Smart Home Integration: Automating Your Entire Entertainment Experience | Basement Transformation: From Damp Storage to Cozy Retreat | Acoustic Treatment DIY: Build Panels That Look as Good as They Sound | Choosing Between OLED, QLED, and Laser Projector: A No-Fluff Comparison | Budget Breakdowns: Real Media Room Builds Under $5K, $10K, and $20K