Stop feeling overwhelmed by endless options. This step-by-step guide breaks down every critical factor—from water pressure compatibility to finish durability—so you can select fixtures that elevate your bathroom’s design and perform reliably for years to come.
Selecting bathroom fixtures is one of the most deceptively complex decisions in home improvement. It’s not merely about matching chrome finishes or picking a trendy shape. The right choices impact daily comfort, water efficiency, long-term maintenance needs, accessibility considerations, and even your home’s functional harmony. Yet many resources offer superficial style advice while overlooking the plumbing realities beneath your sink. This comprehensive guide synthesizes engineering principles, material science, installation constraints, and design psychology into a single actionable framework. Whether you’re refreshing a powder room or planning a primary suite renovation, you’ll gain clarity to choose fixtures that harmonize beauty with dependable performance—without costly regrets down the road.
Introduction: Why Fixture Selection Demands Strategic Thinking
Walk into any showroom or browse online, and you’ll encounter a vast array of bathroom fixtures. Sleek wall-mounted faucets sit beside vintage-inspired bridge designs. Rainfall showerheads share space with precision-engineered handheld wands. Toilets highlight quiet-flush technology and ergonomic contours. In this visual landscape, it’s easy to prioritize aesthetics over practicality—a path that often leads to daily frustrations. A faucet with insufficient spout reach complicates handwashing. A shower valve mismatched to your home’s water dynamics delivers inconsistent temperature. A finish vulnerable to local water chemistry requires frequent attention. These reflect recurring challenges observed across countless renovation scenarios and plumbing discussions.
Bathroom fixtures exist at the intersection of art and engineering. They must fulfill emotional desires—creating a calming sanctuary, expressing personal style—while performing precise mechanical functions under demanding conditions: constant moisture exposure, variable water quality, frequent use, and safety-critical operations. A truly successful selection process acknowledges this duality. It begins not with browsing inspiration boards, but with understanding your unique constraints: existing plumbing configuration, water characteristics, household usage patterns, budget parameters, and long-term ownership context. Only then can aesthetic choices be made with confidence and intention.
This guide introduces the Foundation-Function-Form Framework, a systematic methodology informed by industry standards (including UPC, ANSI, and EPA WaterSense criteria), material durability research, and recurring patterns in fixture performance. We move beyond fragmented advice to deliver a unified decision-making system. You’ll learn how to evaluate valve mechanisms for longevity, interpret finish warranties meaningfully, match fixture dimensions to your sink’s anatomy, and anticipate considerations like pressure-balancing requirements or valve accessibility. By the end, you won’t just have a list of recommended products. You’ll possess a personalized blueprint for selecting every fixture with clarity—transforming uncertainty into informed confidence.
The Foundation-Function-Form Framework: Your Strategic Selection Blueprint
Before a single style choice is made, successful fixture selection requires building a decision architecture grounded in reality. The Foundation-Function-Form Framework eliminates guesswork by sequencing choices logically: first addressing non-negotiable constraints (Foundation), then defining performance requirements (Function), and finally layering on aesthetic expression (Form). This sequence prevents the common pitfall of selecting a visually appealing fixture only to discover compatibility issues with your sink, water pressure, or installation context. Each layer builds upon the previous one, creating an intelligent filter that narrows options while preserving creative freedom where it matters most.
Step 1: Assess Your Foundation (The Non-Negotiables)
Your foundation consists of immutable physical and logistical constraints. Ignoring these invites frustration, unexpected costs, or compromised functionality. Treat this step as a careful assessment of your bathroom’s current state and future context.
Plumbing Anatomy Audit:
Begin under the sink. Count the number of holes drilled in your sink deck or countertop. Standard configurations include:
– Single-hole: One central opening (common for vessel sinks or minimalist designs)
– Centerset: Three holes spaced 4 inches apart (center-to-center), with handles and spout combined in one unit
– Widespread: Three separate components (two handles, one spout) requiring holes spaced 8 inches apart
– Mini-widespread: Components spaced 4 inches apart but sold as separate pieces
– Wall-mounted: No deck holes; supply lines emerge from the wall behind the sink
Measure precisely with a tape measure. If replacing an existing faucet, inspect the valve body condition and supply line connections after removal. Note whether shutoff valves are compression-style (older homes) or quarter-turn ball valves (modern standard). For showers and tubs, identify your valve type: pressure-balancing (single handle controlling temperature and volume) or thermostatic (separate temperature and volume controls). Thermostatic valves require specific rough-in kits and cannot typically be swapped for pressure-balancing models without wall access—a critical constraint often overlooked during planning.
Water Quality & Pressure Reality Check:
Your local water composition significantly influences fixture longevity and performance. Request a Consumer Confidence Report (CCR) from your municipal water provider, or use an affordable home test kit. Key considerations:
– Hardness: Measured in grains per gallon (GPG). Levels above 7 GPG indicate hard water. Minerals like calcium and magnesium accelerate scale buildup on aerators, showerheads, and internal mechanisms. In hard water areas, prioritize fixtures with ceramic disc valves (resistant to mineral scoring) and finishes backed by robust warranties against pitting or corrosion (e.g., technologies like Spot Resist™ or Brilliance® finishes).
– pH Level: Ideal range is 6.5–8.5. Highly acidic water (below 6.5) may corrode metal components; alkaline water (above 8.5) promotes scale. Acidic conditions favor fixtures with polymer or stainless steel internal parts.
– Pressure Assessment: Attach a pressure gauge to an outdoor spigot or laundry sink faucet. Ideal household pressure ranges from 40–60 PSI. Below 40 PSI? Avoid high-flow showerheads or complex multi-spray systems—they may deliver weak performance. Above 80 PSI? Consult a professional about pressure regulation before selecting fixtures; sustained high pressure can stress components and affect warranty coverage. Homes with lower pressure (<30 PSI) often benefit from aerated faucets and showerheads engineered for consistent flow at reduced pressure.
Spatial Dimensions & Clearance:
Measure thoroughly. For vanities:
– Spout Reach: Measure from the back edge of the sink basin to the center of the drain. The spout tip should extend 1–2 inches past the drain to prevent backsplash. For vessel sinks, measure sink height plus desired clearance above the rim (typically 4–6 inches).
– Spout Height: Ensure adequate clearance for comfortable use. Minimum 3 inches above sink rim; 5+ inches recommended for vessel sinks or deep basins.
– Handle Clearance: Open adjacent cabinet doors. Will lever handles interfere? Consider wall-mounted faucets or compact handle styles if space is tight.
For showers:
– Head Placement: Standard mounting height is 78–80 inches from the floor. For rainfall heads, confirm ceiling height allows proper mounting without obstruction.
– Handheld Clearance: Verify the slide bar won’t conflict with shower doors, shelves, or grab bars.
– Tub Spout Reach: Must extend sufficiently to prevent water from running down the tub wall (typically 5–7 inches past the tub rim).
Budget Architecture:
Define three budget dimensions:
– Fixture Cost: The purchase price of the items themselves.
– Installation Complexity: Factor in labor considerations. Wall-mounted faucets require precise rough-in alignment; thermostatic valves need professional calibration. Obtain installation estimates before finalizing selections.
– Long-Term Value: Consider water efficiency (lower-flow fixtures may reduce utility costs over time), maintenance needs (easy-clean finishes reduce effort), and component longevity (quality cartridges may delay future replacements). A fixture with a strong warranty on critical components often represents better value than a lower-priced alternative requiring earlier service.
The Fundamental Principle: Your foundation isn’t a limitation—it’s your strategic advantage. Constraints eliminate paralyzing options and focus creativity where it delivers maximum value.
Step 2: Define Core Functions (Performance Requirements)
With foundation constraints mapped, shift focus to how fixtures must perform for your household. Function defines the operational priorities—solving real problems rather than chasing marketing terms.
Usage Pattern Profiling:
Reflect on these questions:
– Who primarily uses this space? A master bath for adults may prioritize precise temperature control. A children’s bath benefits from lever handles (easier for small hands), anti-scald features, and durable finishes. A guest or powder room might suit touchless faucets for hygiene convenience.
– Peak usage patterns? Multiple simultaneous showers demand consistent temperature stability. Thermostatic valves maintain set temperature despite pressure changes from toilet flushes or appliance use; pressure-balancing valves react more gradually.
– Evolving needs? Consider universal design principles: lever handles requiring minimal grip strength benefit users of all ages and abilities. Comfort-height toilets (17–19 inches seat height) reduce strain. Handheld showers with secure mounts enhance flexibility for bathing, cleaning, or accessibility.
Water Efficiency Intelligence:
Look beyond labels to understand real-world performance:
– Faucets: WaterSense-certified models use ≤1.5 GPM. Modern aerators maintain effective spray patterns at this flow. For vessel sinks, ensure the aerator is removable for periodic cleaning, as mineral buildup can affect low-flow components more noticeably.
– Showerheads: WaterSense requires ≤2.0 GPM. Technologies like air-induction (mixing air with water) create a fuller sensation at lower flows. Evaluate spray patterns: some “massage” settings may use more water than standard modes. In lower-pressure homes, seek showerheads designed for consistent performance across pressure ranges.
– Toilets: WaterSense mandates ≤1.28 GPF. Dual-flush models offer flexibility but have more components. Review independent flush performance data where available—reliable single-flush performance prevents the need for multiple flushes, supporting true water savings. Pressure-assist models offer strong flushes at lower volumes but operate more loudly and may involve specialized parts.
Durability & Maintenance Mapping:
Align materials with your environment:
– Valve Mechanisms: Ceramic disc valves (two ceramic plates sliding against each other) resist mineral buildup, provide smooth operation, and typically offer long service life. Compression valves (relying on rubber washers) are largely obsolete in new quality fixtures due to higher maintenance needs. When comparing options, verify cartridge availability and warranty terms.
– Finish Considerations: Not all finishes labeled “brushed nickel” perform identically. Electroplated finishes vary in thickness and durability. Physical Vapor Deposition (PVD) finishes offer molecular-level bonding for enhanced scratch and corrosion resistance. Many major brands provide lifetime limited warranties on finishes when properly registered. In hard water areas, matte or textured finishes often show mineral deposits less prominently than high-polish options. For high-traffic areas, smooth contours with minimal crevices simplify cleaning.
– Cleaning Practicality: Textured finishes hide water spots better than polished ones but may trap residue in intricate details. Evaluate how easily components like aerators or shower nozzles can be accessed for routine maintenance. Some finishes include surface treatments, though consistent cleaning habits remain the most reliable maintenance practice.
Safety & Compliance Essentials:
Key considerations for peace of mind:
– Temperature Control: Anti-scald protection is required by code in most regions for showers and tubs. Pressure-balancing valves adjust flow in response to pressure changes. Thermostatic valves maintain a precise temperature setting regardless of pressure fluctuations—often preferred in households with children or elderly individuals. Verify compliance with current ASSE standards.
– Material Safety: In the U.S., “lead-free” plumbing fixtures must contain ≤0.25% weighted average lead content across wetted surfaces (per NSF/ANSI 372). Confirm certification, especially with older stock or less familiar brands. This supports water quality safety for all households.
– Universal Design: Lever handles (versus knobs) benefit users with limited dexterity, wet hands, or carrying items. Integrating these principles enhances usability for everyone, regardless of age or ability.
Step 3: Refine Aesthetic Form (Style Integration)
Only after Foundation and Function parameters are established should aesthetics take center stage. This sequencing ensures style choices enhance—not compromise—performance. Form is where personal expression flourishes, guided by intelligent boundaries.
Style Vocabulary Decoding:
Move beyond vague terms like “modern” or “traditional.” Identify specific design languages:
– Transitional: Blends traditional curves with contemporary clean lines (e.g., subtle contours with minimalist hardware). Often versatile for varied tastes.
– Contemporary: Sharp angles, geometric forms, unadorned surfaces. Requires precise installation alignment for best effect.
– Traditional: Ornate details, cross handles, porcelain accents. Tolerates minor installation variations well.
– Industrial: Exposed elements, matte black finishes, utilitarian forms. Authenticity in materials and proportions matters.
– Coastal/Farmhouse: Apron-front sinks, bridge faucets, unlacquered brass that develops a patina over time. Requires commitment to the evolving finish character.
Finish Cohesion Strategy:
Create visual harmony without monotony:
– The 60-30-10 Approach: Apply proportionally to finishes. 60% dominant finish (faucet, shower trim), 30% secondary (lighting, mirror frame), 10% accent (towel bar, accessories). Example: Brushed nickel faucet (60%), matte black lighting (30%), oil-rubbed bronze accessories (10%).
– Temperature Awareness: Warm finishes (brass, gold, copper) versus cool finishes (chrome, nickel, black). Intentional mixing creates contrast; unintentional mixing may appear disjointed. Pro tip: View physical finish samples together under your bathroom’s actual lighting at different times of day—digital images and store lighting can distort perception.
– Patina Consideration: Unlacquered brass or bronze develops a unique aged appearance over time. Beautiful when desired, potentially problematic if unexpected. Confirm finish type: “living finish” = will patina; “sealed finish” = maintains original appearance. Ideal for personal spaces where the evolution is welcomed; consider carefully for guest areas or future resale contexts.
Proportional Harmony Principles:
Fixtures should relate thoughtfully to room scale:
– Compact Powder Room: Avoid oversized vessel sinks or dramatic waterfall faucets—they can overwhelm. Choose compact widespread faucets or single-hole designs with slender profiles.
– Spacious Primary Bath: Larger rainfall showerheads (10+ inches) feel intentional; very small heads may appear lost. Freestanding tubs pair well with substantial floor-mounted fillers.
– Visual Balance: A heavy stone countertop complements a faucet with a solid base. Delicate glass vessel sinks suit slender, minimalist faucets to maintain visual equilibrium.
Future-Proofing Through Thoughtful Choices:
While personal expression matters, consider longevity:
– Enduring Finishes: Brushed nickel, matte black, and satin brass often maintain broad appeal across design trends better than highly polished or intensely colored options.
– Modular Elements: Invest in high-quality core fixtures (faucet, shower valve) in versatile finishes. Express personality through easily changed accessories: towel bars, robe hooks, soap dispensers. These represent a smaller investment and can be updated as tastes evolve.
– Documentation Habit: Record finish codes and model numbers digitally. Exact replacements years later are unlikely—having specifications supports cohesive future updates.
Faucet Deep Dive: Anatomy, Types, and Selection Mastery
Faucets are among the most frequently interacted-with fixtures in your bathroom. Understanding their anatomy transforms selection from superficial to strategic. Every component—from the internal mechanism to the visible aerator—shapes daily experience.
Faucet Configuration Types: Matching Form to Function
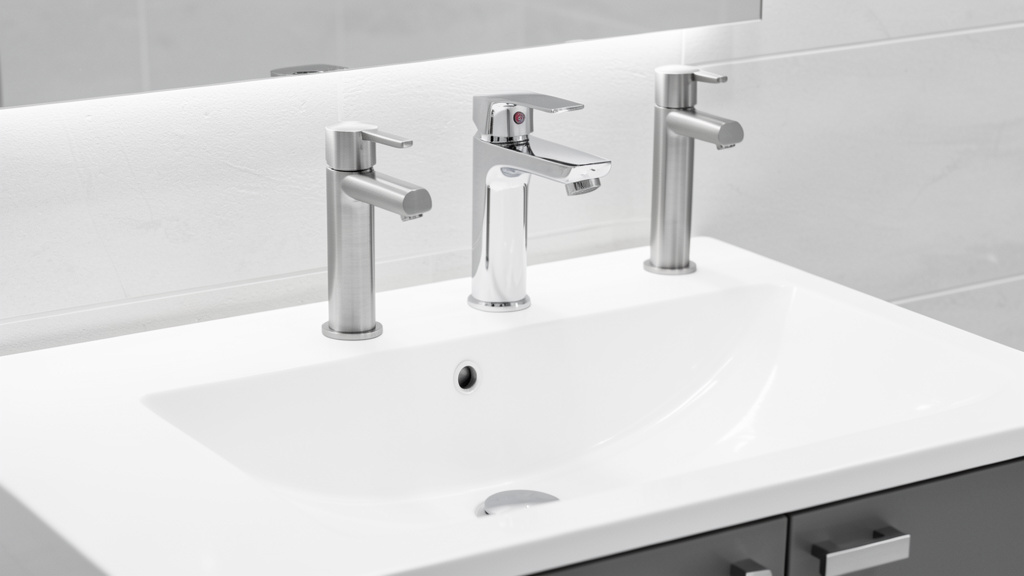
Deck-Mounted Configurations:
– Centerset: Ideal for standard 4-inch spread sinks in powder rooms or children’s baths. Compact, generally affordable, and straightforward to install. Limitation: Less design flexibility; handles and spout are fixed relative to each other. Best for: Budget-conscious updates, small vanities, rental properties.
– Widespread: Offers maximum customization. Handles and spout mount independently, allowing adjustment for non-standard hole spacing (within manufacturer limits). Creates a substantial presence. Best for: Large vanities, traditional/transitional styles, homes with existing 8-inch spread holes. Critical check: Measure the exact distance between outer holes. Some installations labeled “8-inch” may vary slightly—verify compatibility with the fixture’s specification sheet.
– Mini-Widespread: Combines the separate-component appearance of widespread with 4-inch spacing. Excellent for smaller vanities wanting a custom look without widespread’s footprint. Often an overlooked solution for powder rooms.
– Single-Hole: Ultimate minimalist statement. Requires a sink with one pre-drilled hole. Enables vessel sink installations or sleek undermount sinks. Limitation: No room for separate soap dispenser without additional drilling. Solution: Pair with wall-mounted accessories. Best for: Modern designs, vessel sinks, floating vanities.
Wall-Mounted Faucets:
Elevate aesthetics by eliminating deck clutter. Water flows directly from wall to sink, creating clean visual lines. Critical considerations:
– Rough-In Precision: Supply lines must align horizontally and vertically per manufacturer specifications (typically 2–4 inches above sink rim). Even minor misalignment can cause installation challenges. Professional rough-in verification before wall closure is strongly advised.
– Spout Projection: Must extend sufficiently to clear the sink’s front edge (measure sink depth + 1 inch). Too short risks deck splashing; too long may feel awkward during use.
– Climate Consideration: In regions with cold winters, pipes within exterior walls require thorough insulation to mitigate freeze risk. For renovations involving exterior walls, scheduling rough-in work during warmer months can reduce exposure risks during open-wall phases.
– Installation Scope: Requires wall access for valve installation. Budget accordingly for labor complexity compared to deck-mounted options. The visual payoff often justifies the investment in high-impact designs.
Vessel Sink Faucets:
Designed specifically for sinks positioned above the counter. Essential specifications:
– Height: Minimum 7 inches from deck to spout outlet; 9–12 inches ideal for deeper vessels. Standard faucets sit too low, causing splashback.
– Reach: Spout must clear the vessel rim width. Measure the vessel’s outer diameter; spout reach should exceed this by 1–2 inches.
– Drain Compatibility: Requires a vessel-specific drain assembly (typically without overflow) and longer tailpiece. Confirm compatibility with the sink manufacturer’s recommendations.
– Flow Style: Waterfall spouts complement rectangular vessels; gooseneck spouts suit round vessels. For shallow vessels, laminar flow options (minimizing turbulence) may reduce splash compared to aerated streams.
Valve Technology: The Hidden Engine of Reliability
The internal mechanism controls water flow and temperature. Its quality significantly influences long-term performance.
| Valve Type | How It Works | Typical Characteristics | Considerations | Common Applications |
|---|---|---|---|---|
| Ceramic Disc | Two ceramic plates with channels; rotating top plate aligns channels to control flow/temp | Durable, smooth operation, resistant to mineral buildup, drip-resistant | Higher initial investment | Widely recommended—modern standard across quality fixtures |
| Cartridge | Single plastic/metal cartridge moves vertically and rotates | Reliable, widely available replacements, moderate cost | Cartridge longevity varies by brand and water conditions | Budget-conscious updates where brand support is strong |
| Ball Valve | Single rotating ball with chambers controls mix | Simple design, handles high pressure | Seals may degrade over time; repairs can be intricate | Less common in new residential fixtures |
| Compression | Rubber washers press against seats to stop flow | Simple, inexpensive parts | Washers degrade relatively quickly, requiring frequent maintenance | Generally avoided in new installations due to higher upkeep needs |
Insight on Support: When evaluating mechanisms, research brand-specific serviceability. Some manufacturers design systems allowing style updates without replacing internal valves behind the wall—a consideration for future flexibility. Others use color-coded components for easier identification during service. These details often matter more than generic technology labels.
Spout Design: Engineering Comfort
- Gooseneck: High-arching spout (5+ inches clearance). Essential for vessel sinks, deep basins, or comfortable handwashing without knuckle contact.
- Low-Arc: Streamlined profile. Ideal for shallow undermount sinks or spaces with limited vertical clearance.
- Waterfall: Sheet-like flow. Creates a dramatic visual effect but may increase splash risk in shallow sinks. Often paired with laminar flow technology and deeper basins.
- Pull-Down/Pull-Out: Uncommon in standard bathrooms but useful for deep utility sinks. Verify hose retraction mechanism quality and weight balance.
Aerator Considerations:
Often overlooked, the aerator shapes water flow and supports efficiency.
– Flow Rate: Standard ranges from 1.5–2.2 GPM. WaterSense-certified = ≤1.5 GPM. For handwashing, many find 1.8 GPM provides a robust feel without excess.
– Spray Pattern: “Needle spray” (many fine streams) feels gentle; “solid stream” suits filling containers. Some offer dual-mode functionality.
– Serviceability: Twist-off aerators enable easy cleaning. Mineral buildup is common—accessible designs allow quick vinegar soaking. Avoid permanently sealed aerators.
– Splash Reduction: Aerators with flow straighteners minimize turbulence. Particularly valuable for vessel sinks or shallow basins.
Handle Ergonomics: The Daily Touchpoint
- Lever Handles: Intuitive operation (up=on, left=hot, right=cold), require minimal grip strength. Align with universal design principles for broad usability.
- Cross Handles: Classic aesthetic with hot/cold markings. Require a twisting motion—less intuitive for some users. Ensure hot handle is positioned on the left per common convention.
- Knob Handles: Vintage appeal but require firm gripping—challenging with wet or soapy hands. Use thoughtfully based on user needs.
- Touchless/Sensor: Wave-activated operation. Supports hygiene in powder rooms or during specific tasks. Considerations: requires power source (batteries or hardwired), adjustable sensitivity settings to prevent unintended activation, and manual override capability.
Illustrative Insight: In renovation scenarios where rough-in dimensions aren’t verified against fixture specifications prior to tile installation, alignment issues can necessitate wall repairs. This underscores the value of professional verification of rough-in measurements before finalizing wall surfaces—a small step that prevents significant rework.
Shower & Bath Systems: Engineering the Ultimate Experience
Showers represent a convergence of water dynamics, safety engineering, and sensory experience. Thoughtful system design transforms routine hygiene into a consistent, comfortable ritual.
Valve Types: The Control Center
Pressure-Balancing Valves (Typically Single Handle):
– Operation: A internal mechanism reacts to pressure changes (e.g., from a toilet flush) by adjusting hot or cold flow to help maintain temperature stability.
– Characteristics: Generally more affordable, simpler installation, meets baseline anti-scald requirements in many regions.
– Considerations: Temperature and volume are controlled by one handle—adjusting flow affects temperature. Reaction time to pressure changes is slower than thermostatic options. Flow may reduce during pressure events.
– Typical Use: Secondary bathrooms, guest baths, homes with stable water pressure and infrequent simultaneous water use.
Thermostatic Valves (Typically Two Handles):
– Operation: A thermostat element precisely mixes hot and cold water to maintain a user-set temperature regardless of household pressure fluctuations. Volume is controlled separately.
– Characteristics: Precise temperature control, consistent flow during pressure changes, enhanced safety profile.
– Considerations: Higher initial investment, requires professional calibration, needs adequate wall space for the valve body.
– Typical Use: Primary bathrooms, households with children or elderly individuals, homes with multiple bathrooms used concurrently, luxury-focused builds.
Critical Guidance: If your household frequently experiences temperature fluctuations during showers (due to laundry, toilet use, or dishwasher cycles), a thermostatic valve’s stability may justify the investment. For an infrequently used guest bath, a pressure-balancing valve often suffices. Never install a shower system without temperature-limiting protection—this is both a safety imperative and typically required by local codes.
Showerhead Technologies: Beyond Basic Spray
Flow Rate Context:
– Standard (2.5 GPM): Phased out in many regions due to water efficiency regulations. Verify local requirements.
– WaterSense (≤2.0 GPM): Current federal standard for new fixtures in the U.S. Modern engineering delivers satisfying spray patterns at this flow.
– Ultra-Low Flow (1.5–1.75 GPM): Requires advanced engineering (like air-induction) to maintain perceived flow. Suitable for eco-conscious homes with adequate pressure.
Spray Pattern Options:
– Full Body: Even coverage across shoulders and back. Look for descriptions like “wide spray” or “drenching.”
– Massage/Pulsating: Targeted streams. Verify if adjustable—some models default to this mode (which may use more water).
– Mist: Gentle spray for face or hair rinsing. Often combined with other patterns in multi-function heads.
– Dual Systems: Fixed head plus handheld wand. Adds versatility for bathing children, cleaning, or accessibility needs. Ensure the slide bar has secure, adjustable locking positions.
Material & Maintenance:
– Polymer (ABS/Nylon): Lightweight, resistant to corrosion from hard water, won’t shatter if impacted. High-quality polymers offer a substantial feel. Avoid very thin, hollow-feeling constructions.
– Metal (Brass/Zinc Alloys): Heavier feel. Brass generally offers better corrosion resistance than zinc. In hard water areas, polymer nozzles may resist clogging better than metal.
– Nozzle Design: Flexible rubber nozzles allow mineral deposits to be wiped away easily—a significant advantage in hard water regions. Fixed metal nozzles require more meticulous cleaning.
Mounting & Positioning:
– Standard Arm: 12–15 inches long. Angle downward approximately 30 degrees for optimal body coverage.
– Ceiling Mount: For authentic rainfall effect. Requires ceiling rough-in before drywall installation. Minimum ceiling height recommendation: 8 feet. Mount head 78–84 inches above the shower floor.
– Handheld Mounts: Slide bars should accommodate user height range. Lowest setting around 36 inches (accessible for seated users), highest at 60+ inches. Verify bar length matches your needs.
Tub Fillers: Function Meets Presence
Deck-Mounted Fillers:
Standard for alcove tubs. Spout reach must clear the tub wall (5–7 inches). Diverter models redirect water to a handheld shower. Critical: Measure the distance from the tub wall to faucet holes—common spreads are 8″ or 12″.
Floor-Mounted Fillers:
Statement pieces for freestanding tubs. Require precise floor rough-in.
– Reach: Must extend over the tub rim without contact. Measure tub width + 2 inches.
– Height: Outlet positioned 6–10 inches above tub rim to minimize splash.
– Flow Rate: Standard fillers flow at 4–7 GPM. Faster fill reduces wait time. Verify your water heater can supply adequate hot water at this rate (tankless units may have flow limitations).
– Handheld Integration: Built-in wands add versatility. Ensure hose storage is discreet and secure.
Wall-Mounted Fillers:
Clean aesthetic for alcove or freestanding tubs against a wall. Shares similar rough-in precision requirements as wall-mounted faucets. Ideal for contemporary designs.
System Integration: Creating Cohesive Zones
For multi-head systems (rainfall + handheld + body sprays):
– Flow Demand Assessment: Sum the GPM of all intended active heads. Example: Rainfall (2.0) + Handheld (1.8) + 2 Body Sprays (1.5 each) = 6.8 GPM total demand.
– Water Heater Capacity: A standard 40-gallon tank provides limited continuous hot water at high flow rates. Tankless heaters require sufficient BTU capacity. Consult a plumbing professional during the design phase to align system demand with your home’s capabilities.
– Pressure Requirements: Systems demanding >5 GPM typically require minimum household pressure of 50 PSI. Lower-pressure homes may need system adjustments or a pressure booster.
– Control Strategy: Thermostatic valves with individual volume controls for each zone offer intuitive operation. Avoid overly complex diverter systems that may confuse users or develop leaks.
Hard Water Context: In regions with significant water hardness, combining fixture choices (polymer nozzles, easy-clean tips) with routine maintenance (monthly vinegar soaks) supports longevity. For severe hardness, whole-house water treatment is often the most effective long-term strategy to protect all plumbing fixtures and appliances. Consistent, simple maintenance rituals make a meaningful difference in fixture appearance and function over time.
Toilet Selection: Beyond the Bowl
Toilets involve sophisticated engineering affecting hygiene, water use, comfort, and acoustics. Modern innovations address longstanding concerns—if you know what to evaluate.
Flushing Mechanism Overview
| Type | Operation Principle | Typical Water Use | Characteristics | Considerations | Common Applications |
|---|---|---|---|---|---|
| Gravity (Standard) | Tank water weight forces waste through trapway | 1.28 GPF (WaterSense) | Quiet operation, straightforward repair, widely available | Performance varies by design; may require occasional second flush | Most residential settings; reliable baseline |
| Pressure-Assist | Compressed air in tank forces water out | 1.0–1.28 GPF | Powerful flush, reduced clogging potential, water-efficient | Louder flush sound, higher initial cost, specialized parts | High-traffic bathrooms, homes with historical clog issues |
| Dual-Flush | Two actuation options: full flush (solids), reduced flush (liquids) | Avg. 0.9–1.1 GPF | Significant water savings potential | User education needed; mechanism complexity slightly higher | Eco-conscious homes, regions with water restrictions |
| Flushometer (Tankless) | Direct water line pressure flushes bowl | 1.0–1.6 GPF | Space-saving (no tank), powerful flush | Requires adequate water pressure (min ~40 PSI), commercial-grade plumbing | Powder rooms, modern designs prioritizing minimalist aesthetics |
Flush Performance Insight:
Independent flush performance testing (such as MaP testing) measures waste removal capability per flush. Reputable manufacturers often publish these results.
– Baseline: 350 grams (minimum passing threshold)
– Competent: 600–800 grams
– High Performing: 1000+ grams
Selecting a toilet with documented strong flush performance helps ensure reliable single-flush operation, supporting both water savings and user satisfaction. Prioritize models where performance data is transparently available.
Bowl Shape & Height: Ergonomics Matter
- Elongated Bowl: Approximately 2 inches longer than round bowls. Offers enhanced comfort and hygiene for most adults. Requires slightly more floor space. Ideal for primary bathrooms.
- Round Bowl: Compact footprint. Fits efficiently in tight spaces (powder rooms, small bathrooms). May be less comfortable for extended use.
- Comfort Height: Seat height 17–19 inches (vs. standard 15 inches). Reduces strain on knees and hips—beneficial for aging-in-place or users with mobility considerations. Aligns with ADA guidelines. Widely preferred once experienced.
- Skirted Trapway: Smooth, concealed base design. Eliminates hard-to-clean curves at the bowl’s rear. Simplifies floor cleaning and enhances hygiene—worth considering for ease of maintenance.
Advanced Features: Evaluating Value
- Surface Technologies: Glazes like SanaGloss® or Cleansource™ create smoother surfaces that may reduce waste adhesion. Real-world benefit: potentially less frequent deep cleaning, particularly valuable in high-use bathrooms.
- Soft-Close Seats: Hydraulic hinges prevent lid slamming. Highly recommended for households with children. Verify hinge quality—premium models maintain smooth operation longer than basic friction hinges.
- Bidet Integration: Electronic bidet seats (e.g., Washlet®) or standalone bidets enhance hygiene and comfort. Require a nearby GFCI-protected electrical outlet. Planning for this outlet during renovation is far simpler than adding it later.
- In-Wall Carriers (for Wall-Hung Toilets): Concealed tank systems create a floating appearance and ease floor cleaning. Require precise rough-in, structural wall support, and professional installation. Budget significantly more than standard toilets.
Installation Considerations:
– Rough-In Measurement: Distance from finished wall to center of closet flange bolts. Approximately 95% of U.S. homes use a 12-inch rough-in. Verify yours before purchasing—10-inch or 14-inch rough-ins require specific toilet models. Measure carefully.
– Flange Position: Top of flange should be level with or slightly above the finished floor. Significant deviations can compromise seal integrity. Repair kits exist but add complexity.
– Seal Options: Traditional wax rings are effective but messy. Wax-free seals (rubber gaskets) offer reusable, cleaner installation and tolerate minor flange irregularities better. A practical choice for many installers.
Illustrative Insight: In scenarios where water pressure is borderline for certain toilet technologies, selecting a gravity-fed model with a documented high MaP score and enlarged trapway often delivers reliable performance without requiring system modifications. Matching fixture technology to your home’s specific hydraulic profile prevents post-installation dissatisfaction.
Accessory Fixtures: The Finishing Touches That Define Experience
Accessories may seem minor but profoundly impact daily usability and the perceived quality of the space. Thoughtful selection elevates the entire environment.
Essential Accessories Checklist
- Towel Bars: Standard lengths: 18″ (hand towels), 24″ (bath towels), 30″ (bath sheets). Mount height: approximately 48 inches from floor to center. For double bars, space vertically 6–8 inches apart.
- Robe Hooks: Install near shower/tub exit. Height: 60–66 inches. Choose hooks with adequate width to prevent garment stretching.
- Toilet Paper Holders: Mount 26 inches above floor, 8–12 inches in front of toilet center. Spring-loaded arms secure rolls firmly; fixed arms offer simplicity.
- Grab Bars: Valuable beyond accessibility needs. Install in showers (vertical + horizontal) and near toilets. Critical: Must anchor directly into wall studs—never rely on drywall anchors alone. Textured surfaces improve grip when wet. Bars rated for 250+ lbs support safety confidently.
- Soap Dishes & Dispensers: Recessed wall niches reduce counter clutter. For deck-mounted options, choose models with drainage holes to prevent water pooling. Liquid soap dispensers benefit from wide-fill openings for easy refilling.
- Mirrors & Medicine Cabinets: Mirror width typically 70–80% of vanity width. For medicine cabinets, verify interior depth accommodates your products. Recessed cabinets require checking wall cavity depth for obstructions (plumbing, electrical).
Material & Finish Consistency
Apply the 60-30-10 proportion principle consistently. If your faucet is brushed nickel (60%), select lighting in matte black (30%) and accessories in oil-rubbed bronze (10%). Mixing numerous finishes without intention can create visual discord. Practical tip: Purchasing accessories from the same manufacturer collection ensures precise finish matching. Many brands offer coordinated sets across their product lines.
Smart Integration Points
- Heated Towel Rails: Hardwired (requires electrician) or plug-in models. Enhance post-shower comfort, especially in cooler climates. Verify electrical access during rough-in planning.
- LED Mirrors: Integrated, shadow-reducing lighting. Look for dimmable options with adjustable color temperature (2700K–5000K). Confirm wiring access before wall closure.
- Digital Shower Controllers: Touchscreen interfaces (e.g., DTV+, ioDigital™) allow user presets. Require electrical rough-in and professional setup. Represent a significant investment for tech-integrated experiences.
Navigating Common Frictions: Solutions for Real-World Constraints
Even thorough planning encounters unexpected hurdles. Anticipating these scenarios builds resilience into your project.
Low Water Pressure Solutions
- Diagnose First: Determine if low pressure affects the whole house or is isolated. Test multiple faucets. Whole-house issues may require pressure regulator adjustment or well system service. Isolated issues often stem from clogged aerators, valves, or supply lines.
- Fixture Selection: Choose showerheads explicitly designed for lower pressure (“pressure compensating” or “low-pressure optimized”). Brands specializing in this area offer reliable options. Avoid multi-spray or large rainfall heads—they often exacerbate low-pressure challenges.
- Aerator Strategy: Replace standard faucet aerators with models engineered for perceived flow enhancement at lower pressures (e.g., air-induction types).
- Systemic Option: For persistent whole-house low pressure, a water pressure booster pump may be warranted. Consult a professional to evaluate feasibility and sizing.
Hard Water Defense Strategy
- Immediate Step: Install point-of-use filters on showerheads and faucet aerators. Affordable and reduces scale at the source.
- Fixture Selection: Prioritize PVD finishes and ceramic disc valves. Verify warranty coverage specifics for your water conditions.
- Long-Term Investment: Whole-house water softening systems significantly reduce mineral content. Salt-based systems are most effective. While an upfront investment, they extend the life of fixtures, appliances, and plumbing while reducing soap usage.
- Maintenance Ritual: Keep a small container of vinegar or citric acid solution accessible. Soak aerators and showerheads monthly. For finishes, use soft cloths and non-abrasive cleaners to preserve coatings.
Rental Property & Budget Constraints
- Durability Focus: Commercial-grade fixtures (Sloan, Chicago Faucet) withstand frequent use. Look for features like tamper-resistant screws and solid construction.
- Parts Availability: Choose brands with widely available replacement cartridges (e.g., common Moen or Delta models). Landlords benefit from quick, accessible repairs.
- Neutral Appeal: Brushed nickel or chrome finishes appeal to broad tenant preferences. Avoid highly trendy colors or finishes.
- Refinishing Option: Professional-grade epoxy refinishing kits can refresh existing fixtures temporarily. Not a permanent solution, but may extend service life cost-effectively in specific scenarios.
Historic Home Considerations
- Preservation Balance: Original fixtures may hold aesthetic value but lack modern efficiency or safety. Reproduction fixtures from specialized manufacturers mimic vintage aesthetics with contemporary internals (ceramic valves, water-efficient flows).
- Non-Standard Configurations: Older homes often feature unusual hole spacing or valve locations. Adapter plates or decorative escutcheons can cover mismatched holes when exact replacements aren’t feasible.
- Material Safety: If original supply lines are lead, replacement during renovation is strongly recommended for health reasons. Budget for repiping to fixture locations as needed.
Budget Tiers Decoded: Understanding Value at Every Level
Clarity on what each price tier delivers prevents overpaying or underbuying. Value lies in alignment with your specific needs and context.
Budget Tier ($50–$150 per faucet; $100–$300 per shower system)
- Typical Offerings: Value-focused lines from major retailers, entry-level imports
- Characteristics: Zinc alloy bodies (may be less corrosion-resistant long-term), basic ceramic disc valves, electroplated finishes, limited warranties (1–5 years)
- Appropriate For: Rental properties, low-traffic powder rooms, temporary solutions, very tight budgets
- Key Checks: Verify lead-free certification. Confirm replacement part availability—some budget lines discontinue models rapidly. Prioritize valve mechanism quality within the tier.
- Strategy: Allocate available budget toward the internal mechanism. A modestly priced faucet with a reputable cartridge system often outperforms a visually similar alternative with unknown internals.
Mid-Tier ($150–$400 per faucet; $300–$800 per shower system)
- Typical Brands: Core lines from Delta, Moen, Kohler, Pfister
- Characteristics: Solid brass bodies (enhanced corrosion resistance), premium ceramic disc valves (lifetime limited warranties common), advanced finish technologies (PVD or equivalent), strong customer support, readily available parts
- Appropriate For: Primary family bathrooms, long-term ownership homes, renovations where reliability is prioritized
- Value Insight: This tier frequently delivers the optimal balance of performance, durability, and cost for most homeowners. Lines like Delta Foundations, Moen Eva, or Kohler Coralais offer proven reliability.
- Pro Tip: Register your product promptly per manufacturer instructions. Many extended warranties require registration. Maintain digital records of model numbers and receipts.
Premium Tier ($400–$1,000+ per faucet; $800–$3,000+ per shower system)
- Typical Brands: Kohler (high-end collections), Grohe, Hansgrohe, Rohl, Waterstone
- Characteristics: Substantial brass construction, proprietary technologies (e.g., SilkMove® cartridges, AirPower® spray), hand-finished details, comprehensive warranties, distinctive design
- Appropriate For: Primary owner’s baths, luxury-focused builds, spaces where fixtures serve as design focal points
- Value Perspective: Premium investment reflects engineering refinement and material quality. Features like SpeedClean® nozzles (wipe-clean with a finger) or AirPower® (luxurious spray at lower flow) enhance daily experience. For spaces used frequently as personal sanctuaries, the tactile and functional details matter.
- Consideration: Verify service and parts support in your region before selecting niche or imported premium brands.
Anticipating Hidden Costs
- Rough-In Modifications: Adjusting supply lines or drains typically adds $150–$500 per fixture location.
- Valve Replacement: Updating shower valves behind existing tile involves significant labor ($300–$800+).
- Special Orders: Non-stock finishes or configurations often carry premiums (15–25%).
- Disposal Fees: Some municipalities charge for fixture disposal—check local regulations.
- Professional Installation: Budget 30–50% of fixture cost for installation. Complex jobs (wall-mounted, thermostatic systems) trend toward the higher end.
Installation Realities: DIY vs. Professional Guidance
Understanding project scope prevents costly errors. Use this framework to assess your approach.
Suitable for Prepared DIYers
- Replacing Deck-Mount Faucets: When existing hole configuration matches the new faucet, supply lines are accessible, and shutoff valves function reliably.
- Essential Tools: Basin wrench (critical for tight spaces), adjustable wrench, plumber’s putty or silicone sealant, flashlight, bucket, camera (to photograph existing setup).
- Critical Preparation: Shut off water at the main supply valve, not just under-sink valves (older valves may leak when reopened). Take clear photos of all connections before disassembly.
- Pro Technique: Apply plumber’s tape (Teflon tape) clockwise on male threads—3 wraps is typically sufficient. Over-wrapping can cause fitting damage.
Strongly Recommend Professional Assistance
- Any Wall Modifications: Opening walls for new valves, rerouting pipes, or altering rough-ins.
- Thermostatic Valve Installation: Requires precise calibration of temperature limit stops. Incorrect setup poses safety risks.
- Pressure-Balancing Valve Replacement: Involves accessing valves behind finished walls—high risk of water damage if mishandled.
- System Diagnostics: Low water pressure investigation, water heater compatibility assessment.
- Gas Line Work: Never attempt DIY modifications involving gas water heaters.
Pre-Installation Checklist
- Confirm all fixtures are physically on-site before any demolition begins.
- Verify rough-in dimensions match fixture specifications—obtain professional sign-off if uncertain.
- Test all existing shutoff valves; replace any that are stiff or leak.
- View finish samples in the actual bathroom under varying light conditions (morning, noon, evening).
- Photograph the existing plumbing configuration from multiple angles for reference.
- Schedule a plumber inspection of rough-in work before closing walls—this prevents major rework later.
Post-Installation Validation Steps
- Leak Check: Run water for 5 minutes. Inspect all connections with a dry paper towel—moisture reveals leaks not visible to the naked eye.
- Operation Test: Cycle handles through full range. Verify smooth motion without sticking or unusual resistance.
- Temperature Stability (Showers): Run shower for 5 minutes. Have an assistant flush a nearby toilet—temperature should remain stable (thermostatic) or change minimally within safety limits (pressure-balancing).
- Drain Function: Fill sink or tub, then release stopper—water should drain completely without gurgling (which may indicate a venting issue).
Your Questions, Answered
Q: How do I confirm faucet compatibility with my sink’s pre-drilled holes?
A: Measure the distance between the centers of the outer mounting holes. For three-hole setups: approximately 4 inches indicates centerset or mini-widespread compatibility; approximately 8 inches indicates widespread. Single-hole sinks require a faucet designed for one hole, though deck plates (escutcheons) can cover unused holes when adapting configurations. Always cross-reference your measurements with the faucet’s detailed specification sheet—manufacturers provide diagrams showing required hole spacing, deck thickness limits, and mounting hardware requirements.
Q: Are touchless bathroom faucets reliable and water-efficient?
A: Modern sensor faucets from established brands feature adjustable sensitivity settings to minimize false triggers and include manual override functions. They typically conserve water by automatically stopping flow when hands are removed. Battery life generally lasts 1–2 years; models with AC adapter options eliminate battery replacement. They are well-suited for powder rooms or settings prioritizing hygiene. Choosing units with clear override instructions ensures usability during rare sensor issues.
Q: What is the practical difference between “brushed nickel” and “satin nickel”?
A: Terminology varies by manufacturer, leading to confusion. Generally, “brushed nickel” exhibits visible linear grain marks from wire brushing, while “satin nickel” has a smoother, more uniform matte appearance with less pronounced texture. Both typically hide water spots better than high-polish chrome. For accurate comparison, request physical finish samples from multiple brands—digital images and store lighting often distort true appearance. Viewing samples together under your bathroom’s actual lighting is the most reliable method.
Q: Can I retrofit a wall-mounted faucet onto an existing vanity?
A: Only if supply lines are already roughed-in through the wall directly behind the intended sink location. Retrofitting typically requires opening the wall, rerouting pipes, installing an internal mounting bracket, and precise alignment—all before wall repair and finishing. The cost and disruption often exceed replacing the vanity with a deck-mounted faucet solution. A professional site assessment is essential before committing to this path.
Q: How can I reduce shower curtain cling during use?
A: Curtain cling results from airflow dynamics (Bernoulli’s principle). Effective solutions include: using a weighted liner, installing a curved shower rod to create more space between the curtain and user, selecting fabric curtains (less static than vinyl), or running the exhaust fan during showers to balance air pressure. For a permanent solution, frameless glass enclosures eliminate the issue entirely, though they represent a higher investment.
Q: Are vessel sinks practical for family bathrooms?
A: Vessel sinks require specific user habits: gentle faucet operation to minimize splash, wiping the deck after use, and using vessel-specific drains (typically without overflow). They are often best suited for powder rooms or low-traffic bathrooms. For busy family bathrooms, undermount or integrated sinks generally offer lower maintenance. If selecting a vessel sink, pair it with a high-spout faucet (9+ inches) and keep a microfiber cloth nearby for quick cleanup.
Q: What does “lead-free” certification mean for plumbing fixtures?
A: In the U.S., “lead-free” plumbing fixtures must contain a weighted average of ≤0.25% lead content across all wetted surfaces (per NSF/ANSI 372). Reputable manufacturers certify compliance—look for the NSF mark. This standard supports water quality safety, especially important in homes with young children or pregnant individuals. Exercise caution with uncertified imported fixtures or older inventory. Note: “Lead-free” refers to the brass alloy composition; trace amounts exist in all brass but are safely contained within the material matrix when manufactured to standard.
Q: How long do faucet cartridges typically last?
A: Quality ceramic disc cartridges commonly provide 10–15 years of service under normal conditions. Signs of wear include dripping after shutoff, stiff handle operation, or temperature inconsistency. Proactive maintenance isn’t usually needed, but keeping the model number and cartridge part number in your home records simplifies future replacement. For major brands, cartridge replacement is often a straightforward DIY task with abundant online guidance. Budget $15–$40 for the cartridge itself when needed.
Q: Is a thermostatic shower valve worth the additional investment?
A: For primary bathrooms, households with children or elderly individuals, or homes where multiple bathrooms are used simultaneously, the precise temperature control and stability during pressure changes provide significant safety and comfort benefits. In an infrequently used guest bath, a pressure-balancing valve typically meets functional and code requirements adequately. Consider the value of consistent, worry-free shower experiences against the initial cost difference for your specific household context.
Q: Does a water softener eliminate all hard water concerns for fixtures?
A: A properly maintained water softener (regenerated regularly with salt) reduces mineral content substantially, dramatically extending fixture life and reducing cleaning frequency. However, trace minerals may still accumulate over extended periods. Continue simple maintenance rituals: wipe showerheads periodically with a vinegar solution, clean aerators quarterly. Softeners transform hard water management from a frequent chore to an occasional task—they are highly effective but don’t remove the need for basic care.
Q: What is the most frequent oversight when selecting bathroom fixtures?
A: Prioritizing visual appeal before verifying spatial and plumbing constraints. Selecting a faucet without confirming hole spacing, spout reach requirements, or valve compatibility often leads to costly modifications, compromises, or returns. Always complete the Foundation assessment (Step 1 of this framework) before exploring styles. Measure thoroughly, document existing conditions, and consult specification sheets. When uncertain, share photos and measurements with a plumbing professional before purchasing—this small step prevents significant project delays.
Conclusion and Next Step
Selecting bathroom fixtures is an act of designing daily life. The choices you make resonate in every handwash, shower, and moment of quiet routine. This guide has equipped you with a framework to move beyond surface-level decisions—to select fixtures that honor both your aesthetic vision and the practical realities of plumbing, water dynamics, and human use. Remember the three pillars: Foundation (respect your constraints), Function (engineer for your life), and Form (express your style within intelligent boundaries). When these align, fixtures become seamless extensions of your home’s purpose.
Recap: Three Critical Principles
- Audit Before You Adore: Never select a fixture without completing your Foundation assessment—measure hole spacing, document rough-in dimensions, understand your water characteristics. This focused investment prevents extensive frustration later.
- Prioritize the Unseen: Valve mechanisms, finish warranties, and documented performance metrics often matter more than surface aesthetics. Invest in engineering integrity where it counts most.
- Design for Longevity: Consider how choices will serve you over years. Will this finish age gracefully in your environment? Are replacement parts accessible? Does the layout accommodate evolving household needs? True sustainability encompasses both environmental impact and enduring usability.
The 24-Hour Rule: Your Immediate Action Plan
Within the next day, complete this single, powerful step:
🔍 Gather a tape measure, flashlight, and notepad. Spend 20 minutes documenting your bathroom’s current reality.
– Under the sink: Count holes, measure spacing precisely, note valve condition
– In the shower area: Identify valve type (single/dual handle), measure rough-in dimensions if accessible
– At the toilet: Measure rough-in distance (wall to closet flange bolts)
– Note water pressure observations (e.g., does shower temperature change when toilet flushes?)
– Take clear, well-lit photos of every fixture location from multiple angles
Store these notes and images digitally. This concrete data transforms overwhelming choices into targeted, confident decisions. You now hold the blueprint—move forward with clarity.
The Integrated Perspective
Your bathroom exists within your home’s larger ecosystem. Thoughtful fixture selection supports not only personal comfort but also the efficient operation of water heating, drainage, and electrical systems. Water-efficient choices reduce demand on water heaters and septic systems. Properly sized fixtures prevent strain on plumbing infrastructure. When renovating, consider how these choices interact with your home’s holistic function. The most successful bathrooms aren’t defined by the most expensive fixtures, but by the most intentional choices—where beauty, practicality, and system harmony coexist. You now possess the framework to make yours truly your own.
Explore Our Complete System:
How to Measure Your Sink for a New Faucet | Water-Saving Fixtures: A Guide to EPA WaterSense Certification | Bathroom Remodeling on a Budget: Where to Splurge and Save | Hard Water Solutions: Protecting Your Fixtures and Appliances | Universal Design Principles for Accessible Bathrooms | The Ultimate Guide to Bathroom Lighting Layouts | DIY Faucet Installation: Step-by-Step with Pro Tips