Move beyond quick fixes and chemical dependency. Discover a resilient, science-informed system to transform your soil into a thriving ecosystem that nourishes plants season after season.
Healthy soil forms the quiet foundation of every vibrant garden, farm, or landscape—a dynamic matrix of minerals, organic matter, water, air, and countless microorganisms working in concert. Yet many approaches to soil fertility remain fragmented: isolated tips on composting, disconnected advice on cover crops, or product-driven solutions addressing symptoms while overlooking the whole system. Soil vitality flourishes not through single interventions, but through intentional, interconnected practices aligned with ecological patterns. This guide offers a unified, adaptable framework informed by decades of agroecological research and documented experiences across diverse growing environments. Whether you tend a backyard vegetable patch, a suburban flower bed, or a small homestead plot, you’ll gain practical knowledge to assess your soil’s unique character, implement layered fertility-building strategies, navigate challenges with grounded confidence, and cultivate a self-renewing foundation that deepens in richness year after year.
Introduction: Why Soil Is Never “Just Dirt”
Walk barefoot across a forest floor after gentle rain. Notice the spongy resilience beneath your feet, the earthy scent of decomposition, the delicate threads of fungal mycelium weaving through leaf litter. This is living soil in its natural expression—a breathing, evolving entity. Contrast this with compacted garden soil that repels water, forms hard crusts, or yields struggling plants despite repeated fertilizer applications. The difference lies not merely in texture or color, but in biological activity. Soil fertility encompasses far more than NPK (nitrogen, phosphorus, potassium) values on a label. It includes physical structure allowing roots to explore and water to infiltrate, chemical balance making nutrients accessible, and biological diversity cycling nutrients, supporting plant immunity, and building resilience against weather extremes.
Research from long-term studies such as the Rodale Institute’s Farming Systems Trial and meta-analyses in journals like Nature Sustainability indicates that soil managed as a living system often demonstrates improved long-term productivity, water retention, carbon storage, and ecosystem function compared to approaches reliant on soluble inputs. This perspective shifts focus from “feeding plants” to “nurturing the soil food web,” where every choice—from mulch selection to planting timing—becomes an opportunity to strengthen foundational health. This guide synthesizes insights from soil science, microbiology, regenerative agriculture, and ecological design into a cohesive, adaptable protocol. No prior expertise required—only curiosity, consistent observation, and willingness to learn from the land itself.
The Soil Health Wheel: A Four-Layer Framework for Lasting Fertility
Imagine soil fertility as a wheel with four interdependent spokes. Weaken any single spoke, and progress becomes uneven. Strengthen all four in harmony, and momentum builds naturally across seasons. This cyclical framework—Assess, Amend, Activate, Maintain—offers a living roadmap, not a rigid checklist. You’ll revisit each layer annually, deepening understanding as your soil evolves. Unlike fragmented advice, this system clarifies why each action matters and how it connects to the whole. Let’s turn the wheel together.
Layer 1: Assess – Understand Your Soil’s Unique Story
Meaningful improvement begins with clear understanding. Yet “testing your soil” is often reduced to a pH strip dip or a lab report filled with cryptic numbers. True assessment weaves together scientific data, sensory observation, and historical context. This triad reveals not just what your soil contains, but how it functions—and which interventions will create lasting change.
The Three-Pillar Assessment Protocol
Pillar 1: Laboratory Analysis (The Quantitative Snapshot)
Collect a composite sample (15–20 subsamples mixed from across your plot, 6–8 inches deep) and send to a reputable lab. Prioritize tests offering:
– Organic Matter Percentage: A foundational indicator. Below 2% suggests depleted conditions; 3–5% supports most garden needs; 5%+ reflects robust health. Research from the USDA Natural Resources Conservation Service indicates that increasing organic matter by 1% can significantly enhance water retention capacity.
– Cation Exchange Capacity (CEC): Reflects soil’s ability to hold and supply nutrients. Sandy soils (low CEC: 1–10) release nutrients readily; clay soils (high CEC: 20–40) retain nutrients tightly but may limit availability. Organic matter improves CEC across all soil types.
– Base Saturation Ratios: Advanced insight. Labs like Logan Labs report ratios of calcium (60–75%), magnesium (10–20%), potassium (2–5%), and hydrogen (10–15%). Imbalances here may restrict nutrient uptake even when elements are present. Example: Elevated potassium levels (sometimes seen with repeated manure use) can interfere with magnesium absorption, potentially contributing to leaf discoloration in sensitive crops.
– Microbial Biomass Testing (Optional but insightful): Labs like Ward Laboratories offer PLFA analysis, indicating bacterial versus fungal community dominance. Annual vegetables often thrive with bacterial-leaning soils; woody perennials and trees typically benefit from fungal-dominated conditions. This guides amendment choices with greater precision.
Budget-Conscious Path: Cooperative Extension offices (US) or RHS Garden Centres (UK) often provide subsidized basic tests. Pair results with Pillars 2 and 3 for richer context.
Pillar 2: In-Garden Physical & Biological Observation (The Qualitative Narrative)
Lab data offers a moment in time; your senses reveal the ongoing story. Conduct these accessible field checks annually:
– Slake Test (Aggregate Stability): Place a walnut-sized soil clump in a clear jar of water. Soil with good structure (bound by fungal networks and root exudates) holds shape for minutes. Rapid disintegration suggests compaction or low organic matter.
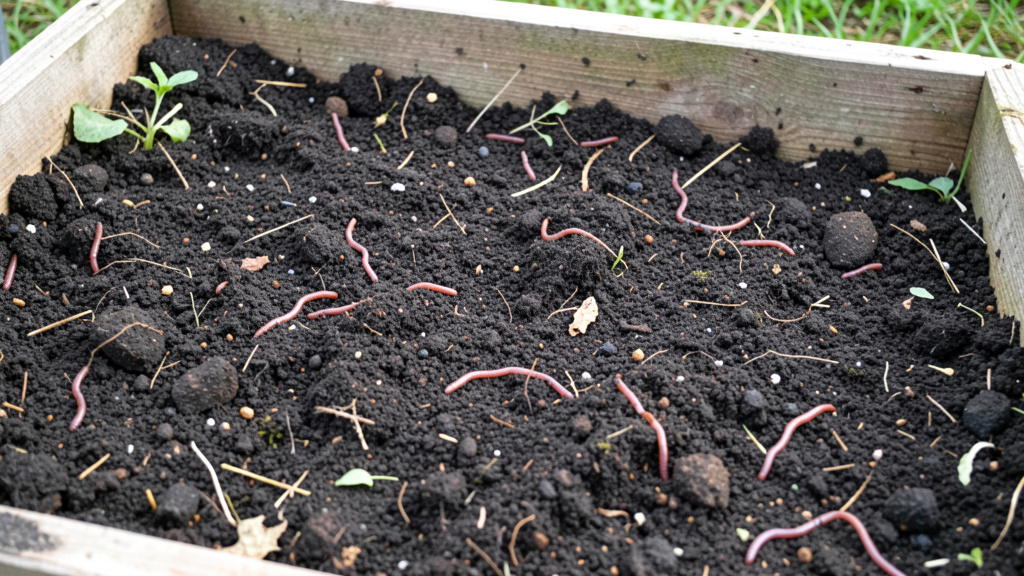
– Earthworm Census: Dig a 12″x12″x6″ hole. Count earthworms. Fewer than 5 may indicate limited biological activity; 10+ often signals thriving conditions. Note types: deep-burrowing nightcrawlers aerate subsoil; red wigglers process surface organic matter.
– Infiltration Rate: Use a tuna can with both ends removed. Push into soil, fill with water twice. Time how long the second inch takes to absorb. Under 10 seconds suggests excellent structure; over 60 seconds may indicate compaction.
– Visual Clues: Crusting after rain? Poor aggregation. Water pooling? Compaction or low organic matter. Limited weed diversity? Reduced biological activity. Dandelions thriving? Often associated with compacted subsoil (their taproots seek deeper resources).
Pillar 3: Historical & Contextual Audit (The Hidden Threads)
Document what came before:
– Previous land use (lawn, construction fill, agricultural field)
– Past amendments applied (synthetic fertilizers may leave salt residues; repeated lime applications alter pH long-term)
– Drainage patterns (observe after heavy rain)
– Sun exposure, wind exposure, microclimate features
– Current plant observations (leaf color, growth patterns, pest interactions)
Documented Integration Example: A gardener in Portland, Oregon, received lab results showing “adequate” phosphorus levels. Yet tomato plants displayed purple undersides—a common visual cue associated with phosphorus availability issues. Pillar 2 revealed slow water infiltration (90 seconds). Pillar 3 noted the lot had been graded with construction fill five years prior. The core issue wasn’t phosphorus absence—it was compaction limiting root access and microbial activity needed to mobilize existing nutrients. The solution focused on Layer 2 (Amend) with gentle compost incorporation and Layer 3 (Activate) with mycorrhizal support—not adding more phosphorus.
Common Assessment Considerations
- Sampling Depth: Roots explore deeply; sample to 8 inches for gardens, 12+ for orchards or deep-rooted systems.
- Seasonal Timing: Test in late fall or early spring when soil conditions are stable. Avoid testing immediately after heavy rain or recent amendments.
- Beyond pH: While pH influences nutrient availability, addressing organic matter often supports natural pH buffering over time. Correcting extreme pH without improving soil biology may yield limited results.
- Interpreting “Deficiencies”: Labs report total nutrients, not necessarily plant-available forms. High total phosphorus with low microbial activity may mean plants cannot access it. Prioritizing biological activation (Layer 3) often precedes adding more nutrients.
Why This Layer Matters: Thoughtful assessment prevents misdirected effort. Adding nitrogen to soil already rich in nitrogen (common in former lawns) may encourage weed growth without benefiting desired plants. Correcting a perceived calcium shortage when magnesium levels are disproportionately high can worsen imbalance. Precision builds understanding—with your soil and your own observational skills.
Layer 2: Amend – Build Structure and Habitat with Purpose
Amending soil is often simplified as “adding nutrients.” More fundamentally, amendments improve physical structure and create habitat for soil life. Nutrients become a natural outcome. Think of amendments as ecological infrastructure: compost builds sponge-like porosity; biochar offers microscopic habitat; gypsum gently opens clay without altering pH. This layer moves beyond “compost is good” to intentional selection based on your Assessment findings.
The Amendment Matrix: Matching Materials to Observed Needs
| Soil Observation from Layer 1 | Primary Amendment Goal | Thoughtful Choices | Budget-Conscious / Adaptive Options | Key Application Notes |
|---|---|---|---|---|
| Low Organic Matter (<3%) | Boost water/nutrient retention, feed soil life | Finished compost (1–3 inches worked gently in), well-rotted manure (horse/cow, aged 6+ months) | Leaf mold (collect autumn leaves), grass clippings (thin layers, avoid herbicide-treated sources) | Never use fresh manure near edible crops. Compost should be dark, crumbly, earthy-smelling—not sour or ammonia-like. |
| Compaction (Clay or Traffic) | Create pore space, improve drainage/aeration | Gypsum (calcium sulfate; helps separate clay particles without raising pH), compost + coarse organic matter | Deep-rooted cover crops (daikon radish, tillage radish), straw mulch (encourages earthworm channels) | Avoid adding sand alone to clay—it may worsen structure. Gypsum application rates vary; consult local extension guidance. Test pH first; use lime only if pH is low and calcium is needed. |
| Sandy Soil (Drains Too Fast) | Increase water/nutrient holding capacity | Compost (highest priority), coconut coir, biochar | Mulch heavily (wood chips, straw), peat moss alternatives (use sparingly due to ecological concerns) | Sandy soils benefit from frequent, light amendments. Top-dress with ½ inch compost each season rather than deep disturbance. |
| Low Biological Activity | Introduce microbial diversity, create habitat | Diverse-feedstock compost, aerated compost tea, mycorrhizal inoculants (where appropriate) | Finished leaf mold, worm castings (small amounts offer microbial support) | Inoculants establish best in moist soil with existing organic matter—microbes need food and shelter to thrive. |
| Nutrient Imbalance (Lab-Confirmed) | Address specific needs without disrupting ratios | Rock phosphate (for phosphorus), greensand (for potassium + trace minerals), alfalfa meal (balanced nutrition) | Wood ash (for potassium—use cautiously, raises pH), crushed eggshells (slow-release calcium source) | Re-test before re-applying. Excess potassium from wood ash may interfere with magnesium uptake. Apply slow-release minerals in fall to allow gradual integration. |
Deep Dive: Compost—the Cornerstone Amendment
Compost functions like a balanced diet for soil. Quality depends on feedstock diversity, carbon-to-nitrogen balance, moisture, aeration, and curing time.
- Foundational Recipe: Aim for approximately 30:1 carbon-to-nitrogen ratio. Layer “browns” (carbon: dried leaves, straw, shredded paper) and “greens” (nitrogen: vegetable scraps, grass clippings, coffee grounds). Volume ratio: roughly 2 parts browns to 1 part greens.
- Hot vs. Cold Composting:
- Hot Method (130–160°F for several days): Reduces weed seeds and pathogens. Requires turning every few days. Needs minimum 3’x3’x3′ volume to retain heat.
- Cold Method (Slower decomposition): Less labor-intensive, preserves fungal networks. Suitable for small spaces or continuous addition (tumbler, worm bin). Takes 6–12 months. Less effective on weed seeds.
- Troubleshooting Common Scenarios:
- Unpleasant Odor: Too many greens or poor aeration. Add browns, turn pile.
- Not Decomposing: Too dry, too small, or low nitrogen. Moisten to damp-sponge consistency, add greens, enlarge pile.
- Attracting Pests: Bury food scraps under 10″ of browns; avoid meat/dairy/oils; use enclosed bin.
- Signs of Readiness: Dark, crumbly texture; earthy smell (no sourness); original materials unrecognizable; cools to ambient temperature. Screen through ½” mesh to remove large chunks.
Practical Insight: Compost maturity affects plant response. Immature compost may temporarily tie up nitrogen as microbes complete decomposition. A simple seed germination test offers clarity: place moist compost in a tray, sow fast-germinating seeds (radish). Vigorous germination (>80% in 5 days) suggests readiness. Poor germination indicates need for further curing.
Biochar: An Ancient Material with Contemporary Relevance
Biochar differs from grill charcoal. It’s biomass (wood, crop residue) heated in low-oxygen conditions (pyrolysis), creating a stable, porous carbon structure that persists in soil. Potential benefits include:
– Habitat Creation: Microscopic pores shelter microbes.
– Nutrient Retention: Negatively charged surfaces may reduce leaching of certain nutrients.
– Water Dynamics: May improve available water capacity, particularly in sandy soils.
– Carbon Consideration: Represents a form of long-term carbon storage.
Critical Application Note: Raw biochar may initially adsorb nutrients. Always “charge” it first: Mix with finished compost or compost tea and allow 2–4 weeks for colonization. Apply charged biochar at modest rates (e.g., 5–10 lbs per 100 sq ft), incorporated gently into the top few inches. Source responsibly—avoid treated wood or unknown origins.
Amendment Application: Technique Supports Outcome
- Surface Application vs. Incorporation: For established beds, top-dress amendments and allow soil life to incorporate them (minimizes disturbance). For new beds or severe compaction, gentle incorporation with a broadfork (not a rototiller) may be appropriate. Never work wet soil—it damages soil aggregates.
- Seasonal Timing: Fall applications allow integration over winter. Spring applications should be light (½ inch compost) to avoid delaying soil warming.
- Layered Bed Building: For new garden areas, consider sheet mulching: cardboard (weed barrier) → compost → topsoil → mulch. Allow 3–6 months before planting for decomposition and soil life establishment.
Why This Layer Transforms Practice: Amendments chosen reactively (“plants look yellow, add nitrogen”) may create new imbalances. Amendments chosen proactively based on assessment address underlying conditions. Adding gypsum to compacted clay improves structure and may enhance access to existing nutrients. Charging biochar supports microbial establishment. Thoughtful application protects soil architecture. This layer invites soil to become an active partner in growth.
Layer 3: Activate – Nurture the Soil Food Web
Amendments prepare the stage; soil life performs the essential work. Layer 3 focuses on cultivating the unseen community—bacteria, fungi, protozoa, nematodes, arthropods—that transforms organic matter and minerals into plant-available resources. This isn’t about “adding microbes” as a quick fix. It’s about creating conditions where diverse, resilient communities establish and thrive naturally. Think habitat stewardship, not inoculation dependency.
Understanding the Soil Food Web: Roles and Relationships
Visualize soil as a dynamic community:
– Decomposers (Bacteria & Fungi): Break down organic matter. Bacteria favor simpler compounds (from young plants, manures); fungi decompose complex materials (wood, straw). Fungi form vast mycelial networks transporting water and nutrients.
– Micrograzers (Protozoa, Nematodes): Consume bacteria and fungi. Their waste releases plant-accessible nitrogen—a critical nutrient-release step often overlooked.
– Predators & Engineers (Mites, Springtails, Earthworms): Regulate populations, cycle nutrients further. Earthworms create stable aggregates and nutrient-rich casts.
Key Insight: Plant-microbe relationships vary. Annual vegetables often thrive in bacterial-influenced soils. Perennials, trees, and shrubs frequently partner with fungal networks. Your planting choices can inform biological goals.
Activation Strategies: Cultivating Conditions for Life
Strategy 1: Diverse Organic Mulches (Habitat and Slow Release)
Mulch offers far more than weed suppression. As it decomposes, it feeds specific microbial communities:
– Straw or Seed-Free Hay: Favors fungal activity. Suitable for pathways, around fruit trees, or under sprawling crops. Note: Hay may contain weed seeds; straw is generally seed-free.
– Wood Chips (Arborist Chips Preferred): Strongly fungal. Ideal for pathways, around established perennials, or designated “chip drop” areas. Important: Avoid mixing fresh wood chips directly into annual vegetable beds—they may temporarily tie up nitrogen during decomposition. Apply as surface mulch only.
– Leaf Mold: Balanced bacterial/fungal support. Excellent for vegetable beds. Collect autumn leaves, moisten, and allow 6–12 months to decompose in a contained area.
– Living Mulch (Cover Crops): See Layer 4. Plants like clover actively feed microbes through root exudates.
Application Guidance: Apply mulch 2–4 inches deep. Keep 2–3 inches away from plant stems to reduce moisture-related issues. Replenish as decomposition occurs. In spring, gently incorporate decomposed mulch into the top inch before adding fresh material.
Strategy 2: Aerated Compost Tea (ACT) – Targeted Microbial Support
True ACT differs from passive “compost tea”:
1. Brewed Aerobically: High-quality compost + microbial foods (kelp, molasses) + oxygen (air pump) for 24–36 hours at 65–85°F.
2. Applied Promptly: Microbes are active; use within hours of brewing completion.
3. Used Purposefully: Foliar application may support leaf surface microbiology; soil drench can introduce diversity to specific areas.
Simple ACT Approach:
– 5-gallon bucket with air pump + airstones
– 2 cups screened compost (diverse feedstocks)
– 1 tbsp unsulfured molasses (bacterial food)
– 1 tbsp liquid kelp (micronutrients)
– Fill with non-chlorinated water (let tap water sit 24h)
– Brew 24–36 hours until foamy. Strain. Dilute if needed. Apply with watering can.
Important Note: ACT amplifies existing biology. If compost lacks diversity, ACT offers limited benefit. Prioritize building excellent compost (Layer 2). ACT serves as a supplement, not a foundation.
Strategy 3: Minimize Soil Disturbance (Protect Existing Networks)
Tillage disrupts fungal hyphae, earthworm channels, and soil aggregates. Consider reduced-disturbance approaches:
– Broadfork for Compaction: Lifts soil without inverting layers. Preserves structure and biology.
– Cover Crops: Roots create natural channels for air and water.
– Designated Pathways: Walk only on established paths to prevent compaction in growing areas. Use boards or gravel in high-traffic zones.
– Embrace Seasonal Habitat: Allow some leaf litter under shrubs; leave plant debris over winter where appropriate. These micro-habitats support beneficial organisms.
Strategy 4: Strategic Plant Partnerships (Root Exudates as Fuel)
Plants release compounds through roots to encourage specific microbial relationships:
– Mycorrhizal Associations: Many plants partner with arbuscular mycorrhizal fungi (AMF), extending root reach. Plants that commonly benefit: Tomatoes, peppers, squash, fruit trees, most perennials. Plants with limited association: Brassicas (broccoli, kale), beets, spinach. Inoculants may support establishment in depleted soils but are unnecessary where native populations exist.
– Nitrogen-Fixing Bacteria: Legumes (beans, peas, clover) host rhizobia bacteria. Inoculating seeds can support success in new or depleted soils.
– Biofumigation Potential: Mustard, radish, and marigold release compounds studied for suppression of certain soil-borne issues. Plant as cover crops before susceptible crops.
Activation Considerations Guide
| Observation | Possible Biological Factor | Supportive Response |
|---|---|---|
| Plants showing nutrient deficiency signs despite fertile-looking soil | Limited micrograzer activity (nutrients locked in microbial biomass) | Apply aerated compost tea; add diverse mulch to support grazer populations |
| Seedling damping off | Conditions favoring opportunistic pathogens | Improve drainage; avoid overwatering; ensure good air flow |
| Slow mulch decomposition | Limited fungal activity (common in sandy or disturbed soils) | Add fungal-influenced compost; use woody mulches; plant fungal-supportive cover crops |
| Persistent pest pressure | Low predator diversity | Plant insectary flowers (dill, alyssum, yarrow); reduce broad-spectrum interventions; add habitat features |
The Guiding Insight: Fertility is not a static condition to achieve once, but a dynamic relationship nurtured continuously among minerals, organic matter, water, air, and living organisms. Activation shifts perspective from soil manager to ecosystem participant—observing, supporting, and allowing natural processes to unfold.
Layer 4: Maintain – Sustain Momentum Through Seasons
Building fertility requires focused effort; maintaining it becomes integrated stewardship. Layer 4 embeds practices into your annual rhythm that prevent regression, adapt to changing conditions, and compound gains over time. This is where gardens transition from high-maintenance projects to resilient, self-regulating systems. Maintenance is proactive care informed by ongoing observation.
The Seasonal Maintenance Cycle: A Living Protocol
Late Winter (6–8 Weeks Before Last Frost)
– Review Notes: Revisit previous season’s observations. What worked well? What needs adjustment?
– Plan Thoughtfully: Select seeds and cover crops suited to your soil observations (e.g., deep-rooted varieties for compacted areas).
– Prepare Materials: Screen compost; gather mulch; charge biochar if using.
– Tool Care: Sharpen blades, oil moving parts. Well-maintained tools reduce soil compaction during use.
Spring (Soil Workable, Not Soggy)
– Light Top-Dressing: Apply ½ inch finished compost to beds. Avoid deep cultivation.
– Cool-Season Cover Crops: Plant crimson clover (fixes nitrogen, attracts pollinators) or oats in empty beds. Terminates easily before summer planting.
– Pathway Mulching: Refresh wood chips or straw to suppress weeds early.
– Early Observation: Note first earthworm activity, emerging weed types (chickweed often indicates moist/fertile conditions; plantain may signal compaction), soil temperature trends.
Summer (Peak Growth Season)
– Living Mulch Strategy: Allow low-growing cover crops (white clover) between rows of tomatoes or corn. Mow periodically to return biomass (“chop and drop”).
– Water Wisely: Water deeply but infrequently to encourage deep roots. Use soaker hoses or drip irrigation to keep foliage dry. Water early morning to reduce evaporation.
– Chop-and-Drop Prunings: Instead of removing spent pea vines or bolted lettuce, cut at soil level and lay on bed as green mulch. Returns nutrients immediately.
– Monitor Plant Responses: Temporary midday wilting is normal; persistent wilting may indicate poor water retention (consider organic matter needs). Leaf color changes may signal imbalances—refer to assessment notes before reacting.
Fall (After Harvest, Before Ground Freezes)
– Soil Testing: Ideal time for lab tests. Soil is stable; results inform winter planning.
– Cover Crop Planting (A Cornerstone Practice):
– Purpose: Reduce erosion, suppress weeds, feed soil life, capture nutrients.
– Mix Selection Guidance:
– Clay-Prone Soil: Daikon radish (bio-tillage) + hairy vetch (nitrogen) + crimson clover
– Sandy Soil: Buckwheat (quick biomass) + cowpeas (nitrogen) + annual rye (nutrient retention)
– General Purpose: “Triple Mix” – cereal rye (structure), hairy vetch (nitrogen), daikon radish (deep rooting)
– Planting Approach: Clear crop residue. Lightly scratch soil surface. Broadcast seeds evenly. Rake gently to cover ¼–½ inch. Water if no rain expected.
– Termination: In spring, cut cover crops at soil level before flowering. Leave roots to decompose. Lay cut biomass as mulch. Avoid tilling—it releases stored nitrogen and disrupts soil structure.
– Bulk Amendment Application: Spread compost, gypsum, or rock minerals. Winter freeze-thaw cycles assist gentle integration.
– Perennial Bed Mulching: Apply 3–4 inches of shredded leaves or straw to protect roots and feed soil over winter.
Winter (Dormant Season)
– Crop Rotation Planning: Group plants by family to disrupt pest cycles (e.g., avoid following tomatoes with peppers). Rotate heavy feeders with soil builders.
– Compost Building: Layer autumn leaves (browns) with kitchen scraps (greens).
– Landscape Observation: Note snow melt patterns. Areas where snow melts first often indicate better drainage—ideal for early crops. Persistent snow may reveal cooler, moister zones.
– Reflection & Learning: Review garden journal. Connect with local gardening groups. Read soil health resources.
Adaptive Maintenance: Responding to Real Conditions
Constraint: Limited Time or Physical Energy
– Focus: High-impact, low-effort practices. Top-dress beds with compost each fall while planting cover crops. Use thick mulch (4 inches) to reduce weeding. Install drip irrigation on timers. Designate permanent pathways. Remember: Consistent small actions prevent larger interventions later. Healthy soil ultimately requires less intensive management.
Constraint: Small Urban Space (Balcony, Container Garden)
– Adaptation: Soil health principles scale. Use quality potting mix amended with 20% finished compost and 10% biochar. Top-dress containers seasonally. Brew small batches of ACT in a gallon jug. Grow “cover crops” like clover in empty pots over winter to refresh soil. Rotate crops even in containers—avoid planting the same family in the same pot consecutively.
Constraint: Extreme Weather Events (Drought, Heavy Rain)
– During Drought: Apply thick mulch (4 inches) to reduce evaporation. Water deeply at root zone. Avoid fertilizing stressed plants. Choose drought-tolerant cover crops like cowpeas.
– After Heavy Rain: Assess erosion. Re-seed bare spots with fast-growing cover crops (buckwheat). Avoid walking on saturated soil. Once dry, lightly aerate if crusted. Add compost to replenish organic matter.
– Building Resilience: Soil rich in organic matter absorbs and releases water more effectively. Maintenance practices build this buffer over time.
Constraint: Persistent Weeds or Pest Pressures
– Weeds as Clues: Dandelions often indicate compacted subsoil; chickweed suggests fertile/moist conditions; bindweed may signal calcium imbalance. Address underlying soil conditions alongside physical management.
– Integrated Approach:
1. Prevent: Healthy soil grows resilient plants. Rotate crops. Use physical barriers.
2. Monitor: Inspect plants regularly. Identify organisms correctly.
3. Respond Minimally: Hand-remove pests. Use strong water spray for aphids. Apply targeted, least-toxic options only where needed.
4. Encourage Beneficials: Plant nectar-rich flowers. Provide habitat (rock piles, log sections).
– Caution: Broad-spectrum pesticides disrupt soil biology and beneficial insect populations, potentially worsening issues long-term.
The Maintenance Mindset
Maintenance is not a chore list. It’s participating in a cyclical dialogue with your land. Each season offers feedback: cover crop vigor reflects soil vitality; earthworm activity confirms biological health; plant resilience mirrors structural integrity. Keep a simple garden journal—photos, sketches, weather notes, observations. Over years, this becomes your most valuable site-specific resource, revealing patterns no lab test captures. You move from following generic advice to developing deep, place-based understanding. This is the heart of enduring soil stewardship.
Beyond the Framework: Contextual Adaptations for Specific Scenarios
While the Soil Health Wheel applies broadly, specific contexts benefit from nuanced adaptations. This section addresses scenarios where standard guidance requires thoughtful adjustment, drawing on documented approaches and ecological principles.
Rehabilitating Challenged Soil: A Phased Approach
Construction sites, heavily trafficked areas, or long-tilled fields may present compacted, low-organic-matter conditions. Recovery benefits from phased, patient intervention.
Phase 1: Stabilization (Months 1–3)
– Focus: Reduce erosion, initiate biological activity.
– Actions:
– Spread 2 inches of coarse wood chips (often available free from arborists). Creates immediate habitat, moderates temperature, begins decomposition.
– Broadcast fast-establishing cover crop mix: buckwheat + annual ryegrass. Water lightly if no rain.
– Install erosion control on slopes if needed.
– Rationale: Wood chips support pioneering fungi and insects. Buckwheat’s dense roots break surface crust; ryegrass stabilizes soil.
Phase 2: Biological Development (Months 4–12)
– Focus: Build organic matter, encourage microbial diversity.
– Actions:
– Mow cover crops before seeding; leave residue as mulch.
– Apply 1 inch of quality compost.
– Plant deep-rooted cover crop mix: daikon radish + cereal rye + hairy vetch.
– Apply aerated compost tea during active growth if resources allow.
– Insight: Daikon radish roots create channels (“bio-pores”) improving subsoil structure without tillage—a technique supported by no-till agriculture research.
Phase 3: Integration & Observation (Year 2+)
– Focus: Transition toward productive use while sustaining gains.
– Actions:
– Plant nitrogen-fixing shrubs (sea buckthorn, goumi) on edges for long-term contribution.
– Begin light vegetable production in small test areas using no-till transplanting into cover crop residue.
– Re-assess soil annually; track earthworm counts and infiltration rate.
– Documented Outcome: A community garden project on a previously compacted urban lot documented improvements over 18 months: organic matter increased from 0.8% to over 3%, earthworm activity became evident, and crop performance improved steadily. Results vary by context—patience and observation are essential.
Adapting to Climate Contexts: Arid and Wet Regions
For Arid & Drought-Prone Regions (Southwest US, Mediterranean Climates)
– Core Focus: Maximize water capture and retention; reduce evaporation.
– Key Practices:
– Contour Swales: Shallow ditches on level contours to capture rainfall runoff. Plant deep-rooted perennials on the downhill berm.
– Sunken Beds: Planting areas slightly below grade capture rain and reduce wind exposure.
– Deep Mulching: 4–6 inches of coarse wood chips or gravel mulch. Gravel mulch may reduce soil temperature.
– Cover Crop Timing: Plant drought-tolerant species (cowpeas, tepary beans, buckwheat) just before expected rains.
– Biochar Consideration: May support water retention in sandy soils. Charge thoroughly before applying.
– Note: Avoid high-nitrogen amendments that stimulate excessive leaf growth and water demand. Prioritize phosphorus and potassium for root development and stress tolerance.
For Wet & Flood-Prone Regions (Pacific Northwest, UK, Humid Climates)
– Core Focus: Enhance drainage; prevent anaerobic conditions.
– Key Practices:
– Raised Beds with Drainage Layer: Build beds 12+ inches high. Consider coarse organic matter (wood chips) in the base layer.
– Gypsum Application: May help improve structure in clay soils without altering pH (important in naturally acidic regions). Consult local extension for suitability.
– Cover Crop Selection: Deep-rooted species (tillage radish, sorghum-sudangrass) to enhance drainage. Avoid water-loving species in poorly drained spots.
– Fungal Emphasis: Wet conditions may favor bacteria; support fungi with woody mulches and fungal-influenced compost to improve aggregation.
– Critical Timing: Never work wet soil. Wait until a handful crumbles when squeezed. Compaction from working wet clay is difficult to reverse.
Navigating Practical Considerations
- Organic Certification (USDA NOP, EU Organic, etc.):
- Approved amendments vary by standard. Compost must meet specific production criteria. Rock minerals and approved cover crops are generally permitted.
- Prohibited materials typically include synthetic fertilizers and sewage sludge (“biosolids”).
- Documentation of all inputs and practices is required for certification. Consult your certifier early.
- Urban Settings:
- Check local ordinances regarding composting, rainwater harvesting, or keeping animals.
- Community gardens benefit from shared soil management agreements.
- Environmental Stewardship:
- Consider peat alternatives (coconut coir, leaf mold) due to wetland conservation concerns.
- Source materials locally when possible to reduce transport impacts.
- Test soil before adjusting pH—unnecessary amendments waste resources and may disrupt ecosystems.
Navigating Common Frictions: Time, Budget, Space, and Perspective
Real-world constraints shape practice. This section addresses practical barriers that may hinder soil-building efforts, offering tiered pathways: Ideal, Budget-Conscious, and Foundational.
Friction 1: “I Don’t Have Time for All This”
- Ideal Path: Integrate soil care into existing routines. Drop spent tomato vines as mulch while harvesting. Pile pulled weeds (before seeding) under shrubs to decompose. Dedicate 10 minutes weekly to observation—note one change.
- Budget-Conscious Path: Focus on one high-leverage action per season. Fall: Plant cover crops in empty beds. Spring: Top-dress with ½ inch compost. Summer: Apply thick mulch. Winter: Sketch next year’s layout. Consistency outweighs intensity.
- Foundational Step: Minimize soil disturbance. Every time you avoid unnecessary tillage, you protect soil structure and biology. Add whatever organic matter is accessible (leaves, grass clippings) as surface mulch. Let natural processes begin.
- Perspective Shift: Soil building reduces future labor. Healthy soil requires less watering, weeding, and amendment over time. View current effort as investment yielding long-term ease.
Friction 2: “Quality Amendments Are Too Expensive”
- Ideal Path: Develop closed-loop systems. Compost all kitchen scraps and yard waste. Collect autumn leaves from neighbors. Partner with local coffee shops for grounds or stables for manure (verify no persistent herbicides).
- Budget-Conscious Path: Prioritize free/low-cost resources:
- Leaves: Create leaf mold (free, excellent soil conditioner).
- Grass Clippings: Use as thin mulch layer (avoid if treated with herbicides).
- Weeds: Chop-and-drop before seeding (returns nutrients).
- Cover Crops: Seed costs pennies per square foot; they generate fertility.
- Foundational Step: Start a simple “compost corner”—pile kitchen scraps under a bush. It won’t be perfect compost, but decomposing matter supports soil life. Better than landfill.
- Insight: Calculate true value. A $20 bag of compost covers ~10 sq ft once. $5 of crimson clover seed covers 500 sq ft and adds nitrogen for next season. Cover crops offer exceptional value.
Friction 3: “My Space Is Very Small (Balcony, Tiny Yard)”
- Ideal Path: Container soil health. Use fabric pots (promote air pruning). Mix potting soil with 30% finished compost + 10% biochar. Top-dress seasonally. Grow micro-cover crops (clover, buckwheat) in empty pots over winter.
- Budget-Conscious Path: Repurpose containers. Make compost tea in a gallon jug. Use coffee grounds (free from cafes) as light top-dressing for acid-preferring plants.
- Foundational Step: Even one pot benefits. Add a handful of compost to store-bought mix. Place where rain reaches it. Allow a single clover plant to grow and decompose in the pot.
- Key Insight: Soil principles are scale-invariant. Nurture that small space with intention.
Friction 4: “Others Question My Methods (Messy Gardens, No-Till)”
- Ideal Path: Share results gently. Offer exceptionally flavorful produce from your no-till bed. Point out fewer weeds in mulched paths. Invite curiosity: “Want to see the earthworms under this mulch?”
- Budget-Conscious Path: Create “showcase zones.” Keep visible areas tidy with defined edges and attractive mulches. Reserve experimental practices for less visible areas. Beauty builds credibility.
- Foundational Step: Start small and privately. Build one no-till bed out of view. Let success speak. Document growth with photos.
- Insight: Frame soil health around shared values: “This method uses less water,” “It supports pollinators,” “It builds long-term garden health.” Connect to common ground.
Friction 5: “I Tried Composting/Cover Crops and It Didn’t Work”
- Common Scenarios & Adjustments:
- Compost Smelled Bad: Too wet or too many greens. Add browns (shredded paper, dry leaves), turn pile.
- Cover Crops Didn’t Germinate: Planted too deep or soil too dry. Scratch seeds into surface; water lightly after planting.
- Weeds Took Over: Planted cover crop too late. Sow immediately after harvest.
- No Visible Results: Soil health changes are often subtle initially. Track earthworm counts or water infiltration—small wins build confidence.
- Reframe: Every attempt offers data about your specific conditions. A cover crop that struggled reveals soil temperature, moisture, or timing needs. This is learning, not failure. Adjust and continue.
Your Questions, Answered
Q: How long does it realistically take to see improvements in soil fertility?
A: Observable changes often begin within one growing season: improved water infiltration, increased earthworm activity, reduced weed pressure. Measurable shifts in organic matter (via lab test) typically require 2–3 years of consistent practice. Long-term agricultural studies indicate that systems incorporating no-till practices and cover crops may show gradual annual increases in soil organic carbon. Patience paired with persistent, observant action yields compounding benefits.
Q: Can I use store-bought compost or bagged “garden soil”? How do I choose wisely?
A: Yes, but quality varies. Evaluate before purchasing:
– Smell: Should be earthy. Avoid sour, ammonia, or chemical odors.
– Texture: Crumbly, not clumpy or dusty. Squeeze a handful—it should hold shape briefly then crumble.
– Ingredients: Avoid vague terms like “topsoil.” Look for “compost” with listed feedstocks. Be aware of biosolids (treated sewage) if that is a concern for you.
– Certifications: In the US, the US Composting Council’s “Seal of Testing Assurance” (STA) indicates lab-tested safety and maturity. Municipal compost facilities often sell screened, quality compost affordably.
Q: Is tilling ever appropriate? What about double-digging new beds?
A: Tilling is a tool with specific, limited applications—not routine practice. Potential scenarios:
– Initial preparation of severely compacted or degraded soil (follow immediately with cover crops and compost to rebuild structure).
– Incorporating large volumes of coarse organic matter into new hugelkultur beds.
Double-digging is generally discouraged by contemporary soil science. It disrupts soil horizons, severs fungal networks, and brings dormant weed seeds to the surface. For new beds on poor soil, alternatives like sheet mulching (layering cardboard, compost, mulch) or deep mulching with wood chips for 6–12 months before planting build fertility without inversion.
Q: My soil test shows high phosphorus. Should I stop adding compost?
A: Not necessarily—but adjust strategy. Elevated phosphorus (sometimes from historic manure use) may affect availability of other nutrients. Consider:
– Using compost made primarily from plant-based materials (leaves, straw) rather than manure-heavy sources.
– Focusing on carbon-rich amendments that support fungi (wood chips, straw).
– Planting phosphorus-scavenging cover crops like buckwheat—their roots release compounds that may improve phosphorus mobility.
– Avoiding all phosphorus-containing amendments.
– Re-testing in 1–2 years. Organic matter management often supports gradual nutrient balancing.
Q: Do I need to test my soil every year?
A: Frequency depends on context:
– New garden or degraded soil: Test annually for first 2–3 years to track progress.
– Established healthy garden: Test every 2–3 years. Focus on organic matter and pH trends.
– Ongoing monitoring: Supplement lab tests with field observations (earthworm counts, infiltration rate, plant vigor). These offer real-time feedback.
– Trigger events: Test after major amendments, extreme weather, or persistent plant issues.
Consistent observation often provides more timely insight than sporadic testing.
Q: Are synthetic fertilizers ever compatible with soil health goals?
A: In regenerative frameworks, synthetics are generally avoided because they:
– Provide nutrients in soluble forms that may bypass microbial activity, potentially weakening soil food web connections over time.
– Often contain salts that may affect soil structure and microbial habitats.
– Can create dependency where plants rely less on symbiotic relationships.
However, during transition phases or specific challenges, minimal, targeted use may be pragmatic. If used:
– Choose slow-release or organic-based options where possible.
– Always pair with organic matter additions (compost, mulch) to buffer impacts.
– View as a temporary support, not a long-term strategy. The aim remains building self-sustaining fertility.
Q: How do I manage soil health in containers or raised beds?
A: Container soil degrades faster due to leaching and limited biology. Protocol:
– Annual Refresh: Each spring, remove top 1–2 inches of old mix. Replace with equal parts finished compost + fresh potting mix.
– Seasonal Feeding: Apply diluted compost tea every 2–3 weeks during active growth.
– Overwintering: After frost, plant a “cover crop” in empty pots: white clover or buckwheat. Cut and drop before spring planting.
– Mix Longevity: After 2–3 years, screen old mix. Recharge by mixing 50% old mix + 30% compost + 20% new mix + small amount of biochar per gallon.
– Critical: Never reuse potting mix without amendment—it may become hydrophobic and nutrient-depleted.
Q: What’s the single most impactful action for someone starting today?
A: Plant a cover crop in any bare soil this fall. Why it works:
– Prevents erosion and nutrient loss over winter.
– Suppresses weeds organically.
– Feeds soil biology with living roots.
– Costs very little per square foot.
– Requires minimal effort (broadcast seeds, rake lightly).
– Builds visible momentum—seeing green growth where soil was bare is deeply encouraging.
Start small: a single 4’x4′ bed. Success here builds confidence to expand.
Q: Can soil health practices reduce watering needs?
A: Yes—this is one of the most consistent benefits. Research from the USDA NRCS indicates that increasing soil organic matter enhances water-holding capacity. In practical terms:
– A garden bed with 3% organic matter may require watering twice weekly in summer heat.
– The same bed at 5% organic matter may need watering only once weekly.
– At higher levels, watering frequency decreases further, and plants withstand dry spells better.
Mulching compounds this effect—reducing evaporation significantly. This supports resilience, especially in water-limited regions.
Q: How do I explain “messy” soil-building practices to HOA or neighbors?
A: Frame benefits around shared values:
– For aesthetics: “This cover crop (crimson clover) has attractive flowers that support bees. I’ll mow it before it sets seed.”
– For property value: “Healthy soil grows healthier plants with fewer inputs—protecting our shared environment.”
– For community: “I’m exploring water-wise gardening practices supported by our city’s sustainability program.”
– Show, don’t tell: Share surplus produce. Exceptional flavor speaks volumes.
– Compromise: Keep edges neatly trimmed; use attractive mulches (cedar chips) in visible areas. Ecology and aesthetics can coexist.
Conclusion: Your Soil’s Journey Begins With Attention
Soil fertility is not a destination reached by a single action. It is a practice of consistent attention—a series of small, thoughtful choices that accumulate into meaningful transformation. You now hold a flexible framework—Assess, Amend, Activate, Maintain—to navigate this journey with clarity. Remember the core insight woven throughout: soil is alive. It responds to care with increasing vitality. By shifting focus from short-term plant appearance to long-term soil health, you cultivate resilience, support watershed protection, and participate in a deeply rooted tradition of land stewardship.
Recap: Three Guiding Principles
- Observe Before Acting: Let soil tests and sensory clues guide decisions—not assumptions or marketing claims. Precision prevents misdirected effort.
- Nurture the Biology: Every amendment, mulch layer, and cover crop choice should prioritize creating habitat for the soil community. Nutrient availability follows biological activity.
- Honor Nature’s Pace: Soil building operates on ecological time. Trust the process. Celebrate incremental signs—earthworms after rain, water soaking in readily, seedlings emerging with vigor.
The 24-Hour Invitation: Your First Step
Within the next day, complete one small action that moves you forward:
→ If soil is bare now: Order a small packet of crimson clover or buckwheat seeds.
→ If you have a compost area: Turn it once, adding dry leaves if it feels dense.
→ If feeling uncertain: Walk to your garden space. Kneel down. Hold a handful of soil. Notice its color, texture, scent. Write one observation.
This micro-action breaks inertia. It transforms knowledge into direct experience. Momentum begins with motion.
The Wider View: You Are Part of a Growing Practice
Every handful of compost added, every cover crop planted, every patch of soil tended with care contributes to a quiet, widespread renewal. Regenerative soil practices are restoring land across continents—from community gardens in cities to farms reversing desertification. You are not just gardening. You are participating in healing the living skin of the Earth, one square foot at a time. The legacy of fertile soil you nurture will support life far beyond your own season. Start where you are. Use what you have. Move with intention. The soil is ready.
Explore Our Complete System:
The No-Till Garden Handbook: Building Beds That Thrive Year After Year | Mastering Compost: From Kitchen Scrap to Black Gold | Cover Crops Decoded: A Season-by-Season Planting Guide | Water-Wise Gardening: Strategies for Drought Resilience | The Regenerative Lawn: Beyond Chemical Dependence | Seed Saving for Gardeners: Preserve Biodiversity in Your Backyard | Building Habitat: Attract Beneficial Insects to Your Garden